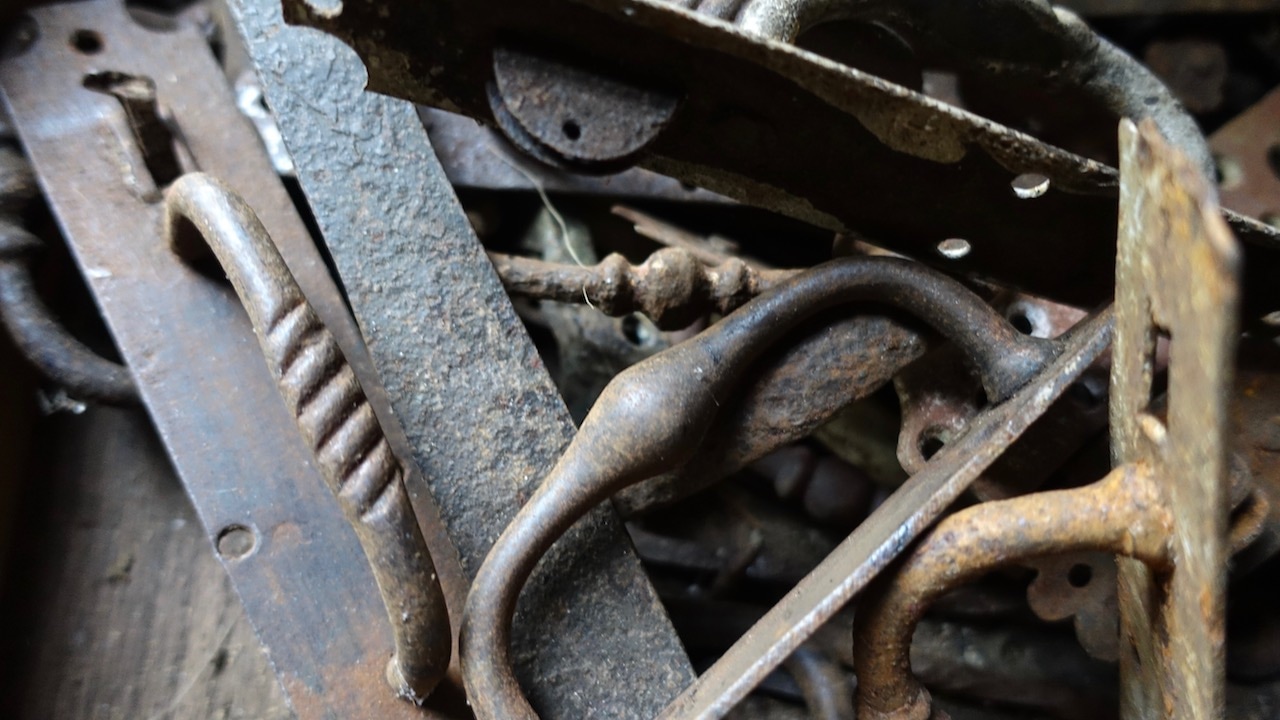
 Our school building is coming together in several remarkable ways. The most unusual part of the story involves many of the building materials we are acquiring through salvaging and where those materials are coming from; namely the estate of a good friend who recently passed away, at 99 years old, named Huston. [You might be interested in this previous blog post on tomakeandtobe.com for some of Huston's back story.] Then there’s the community help we have been receiving in cutting the joinery for the timber frame for our new school from generous and skilled friends who are donating their time. Finally there’s the information that Kenneth gleans from the wooden beams, wide old boards and hand made windows we’re reusing. I’ll let Kenneth tell it: - AK “Most of the time when people build something, they buy new materials. This generally guarantees them fairly consistent dimensions, and no nails to pull or rot to watch out for. I really appreciate that our building will have a special story though, and a tangible connection to the past through its salvaged materials, despite the extra effort involved. Our craft school building also feels like a fitting tribute to Huston and his life-long work of collecting and salvaging, he was always enthusiastic to share knowledge with anyone who was curious about traditional wood working. When Huston passed away around Christmas, he had been collecting materials for over 80 years. Since I have the good fortune of having known him, his estate and piles of potential are such a rich resource, available right here and right at this moment, and it’s hard to think about doing this project in a way that wouldn’t incorporate as much as I can of what he left behind. 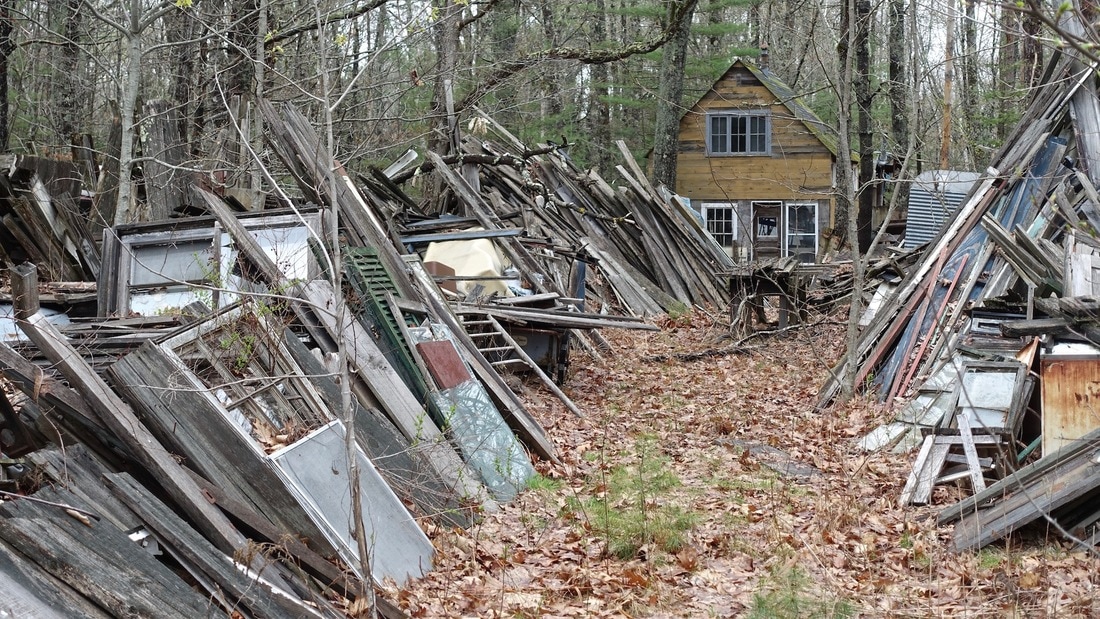 Lots of POPs (Piles of Potential) at Huston's. From the photograph you can see a bit of what Huston collected during his years of diligent salvaging. He couldn’t really stand to see useful tools and materials get wasted. He was generally unwilling to sell or give anything away though, unless he thought he wouldn’t need it, and also only if he approved of the application and intended use of the items in question. This approval was rarely granted, and he was a great optimist about how many projects he might get to, so he ended up filling acres of his family’s property with pieces of old buildings, tools, wood, etc. It's been challenging to find boards of consistent length, width and thickness at Huston’s.  Dan & Zoe helping with culling & loading boards. Sometimes Huston did a good job of keeping things covered and sometimes not so much. There are hundreds of stacks of boards, generally all of them now have years of organic material piled on top. Sometimes he had covered them with sheet metal - those held up better than the ones which he covered with tarps. Sometimes he had stickered them, these generally had boards which were in much better shape. Usually the top layer or two was pretty well rotted, and then you’d have some good boards in the middle and then as you got closer to the ground you’d find more rot. Sometimes the rot was in the form of mycelium running through the boards, sometimes carpenter ants had gotten in there, but mostly it was water damage and fungus. 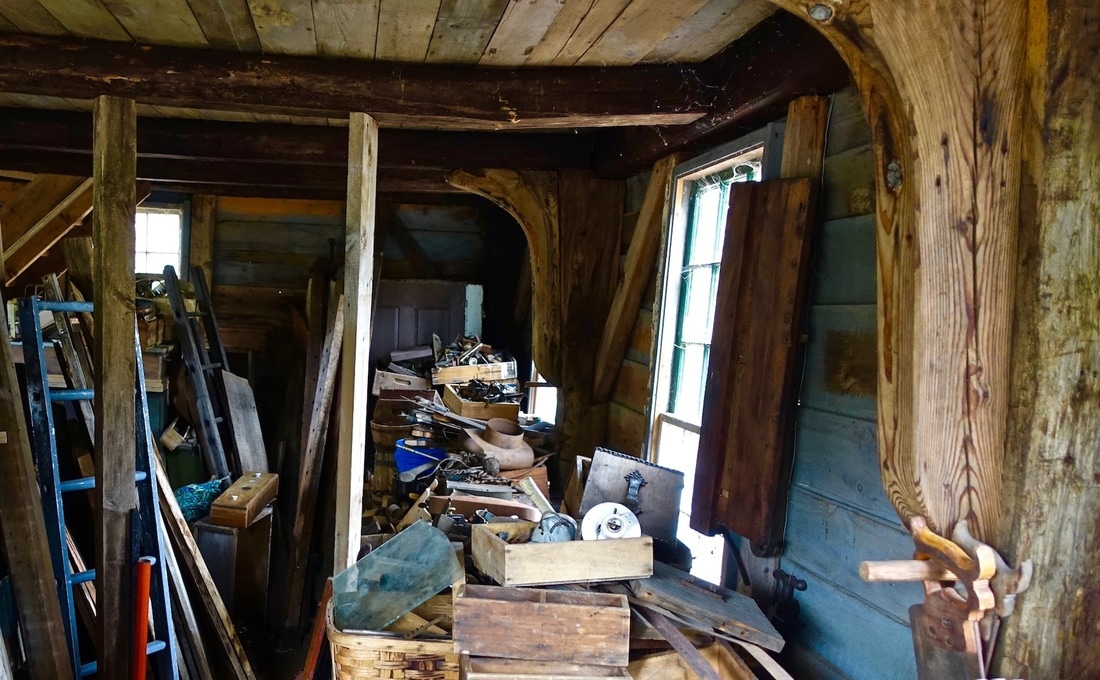 Interior shot at Huston's - notice the knees. Never the less, it’s pretty amazing to think that one person amassed so much stuff in an effort to keep things from being thrown away or wasted, like a little snapshot of how much has actually gone to the dump in our culture. It is a sad thing to me that a lot of Huston’s efforts did not manifest into new projects, and much of what he collected is on its way to returning to dirt. I’m really glad that I can use a few of his materials so that there will be something of his that is tangible and able to continue on into the future, in a way that I know he would have liked. Not all of the materials for our school building will come from Huston's. I have posts, tie beams and studding from a reclaimed building I bought several years ago. We have bought new wood for the rafters and the bottom plate. 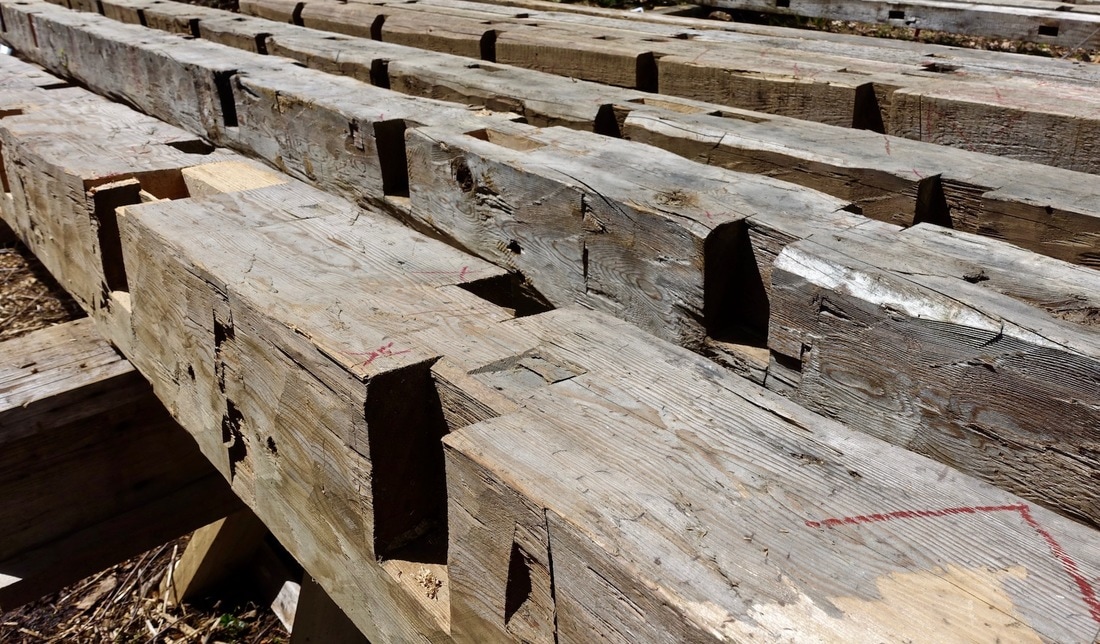 Hand hewn tie beams. Our friend Andrew donated these tie beams which have been a key part of our new structure, I’m particularly fond of them since they are hand hewn, which dates them to be the oldest beams in the building. Hand hewing was often done on-site; people would fell a tree, hew it up and put it into the building right there. The marks that you see in this photo have been made by squaring up the tree with an scoring axe, followed by work with an adze and a broad axe to smooth and finish. These are all old growth hemlock beams with tight growth rings, maybe 1/32” apart. These tie beams have joist pockets that will create the floor structure for the 2nd floor of the building. 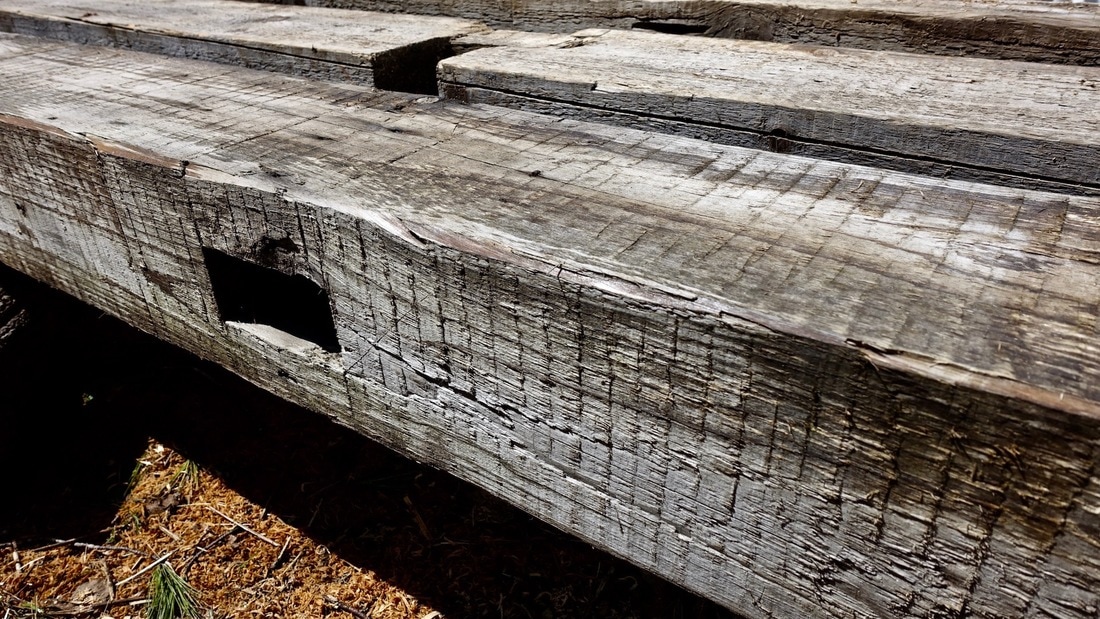 These beams were cut with a water-powered saw mill. This photo shows beams that were sawn with a water powered saw mill. Huston called these up-down saws. They were basically a big frame saw. Think of a section of a band saw blade (one that is not connected to itself in a circle) locked into a frame. This frame is attached to a series of cogs and a track, and every time the saw retracts after having sawn down through the wood, the log is moved forward one increment before the saw blade comes down again. So you get those very regular marks from the saw, as well as distinct little marks from the cog as it moves the log along. Most of the siding boards we have were also sawn with up-down saw mills that would have been water powered. Circular saw mills didn’t really come into this area the until the late 1800’s, before that it was all water-powered saw mills. A circular saw of course leaves round saw marks, you would have seen those more after the Civil War, when they became more popular. 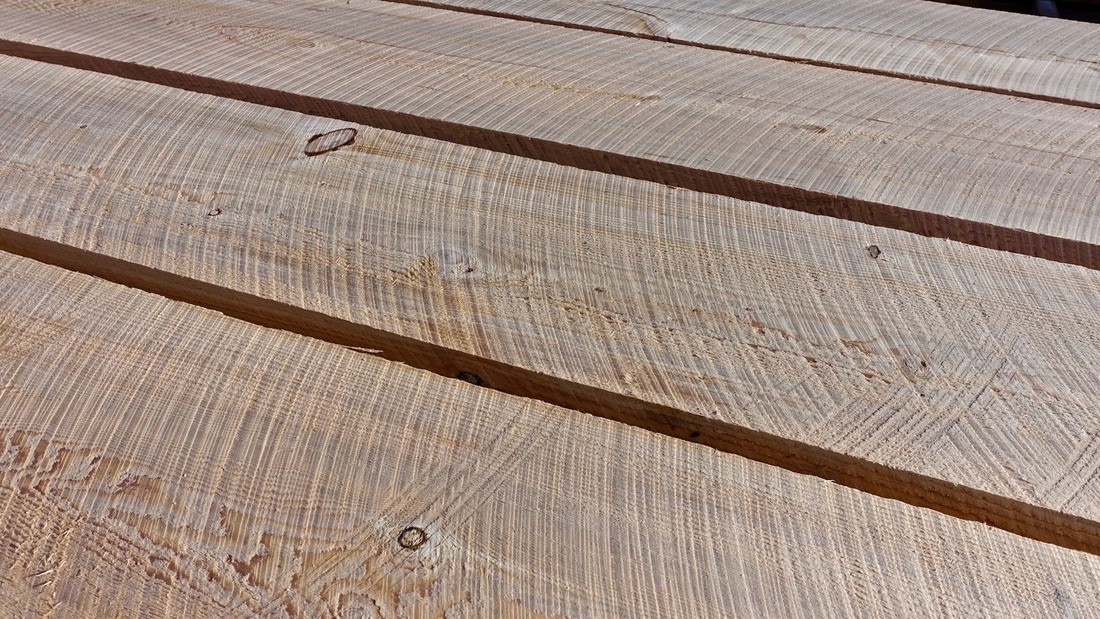 Modern, circular saw marks on new beams. Here’s a shot of our newer beams, the ones we bought for the bottom floor system, with modern circular saw marks. We didn’t have any of the first floor system from the building which I had bought, I assume it had all been rotted. We’ll be using new hemlock for the floor structure of the ground level as well as the roof rafters. This new, 2nd growth wood ultimately has a much lower weight and density, with wider growth rings. It's still all very heavy right now since it’s so freshly cut and full of water. 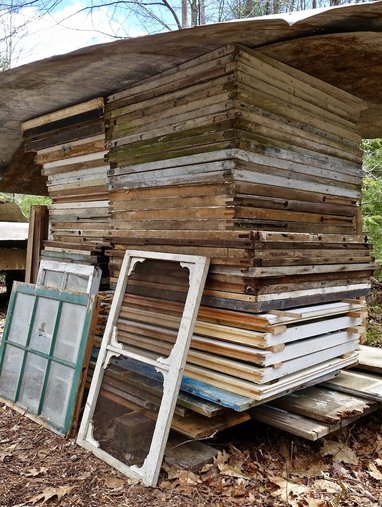 Window sashes. All these windows are from Huston’s. There are a variety of sashes here, the bottom white ones are a little bit thicker, they’re solid wood but they’re machine made. The thinner ones above are all handmade with lovely through-cut mortise and tenon joinery, they are hand-planed with special moulding profile planes. Huston actually had all the wooden moulding planes for making wooden window sashes. These windows will all need to have frames made and be reglazed. The wood will need to be treated with linseed oil and some of the glass needs to be replaced. All the windows have 9 over 6 lights, that is 9 panes of glass in the upper sash, above 6 panes in the lower sash, which you see on historic houses around here. 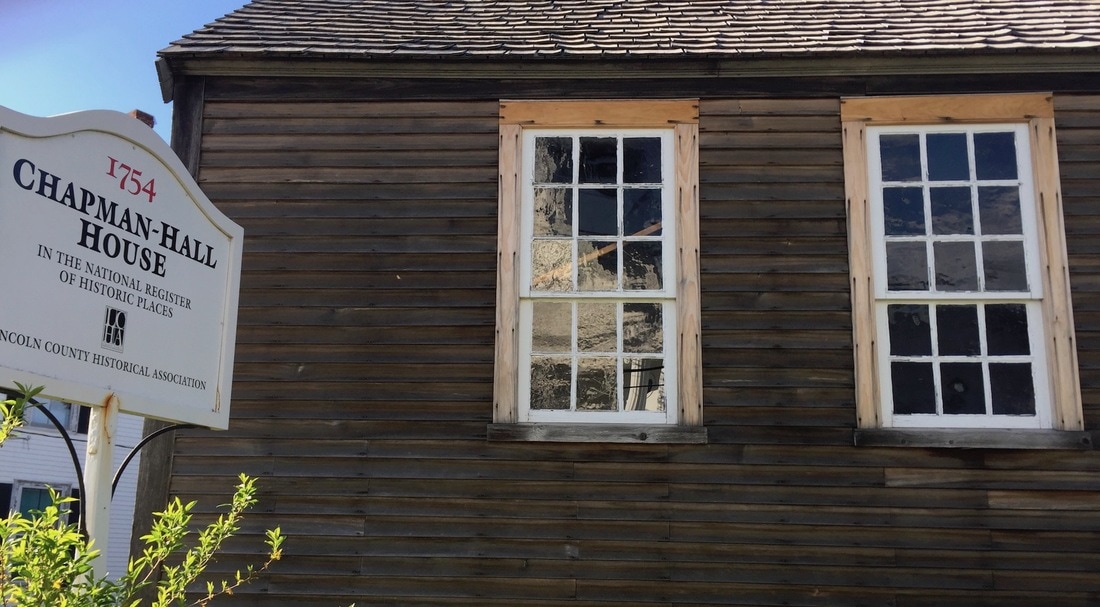 An historic house in Damariscotta, Maine; the Chapman-Hall House, built in 1754. Notice the 9 over 6 lights. Our new/old windows will all need to have frames made and be reglazed. The wood will need to be treated with linseed oil and some of the glass needs to be replaced. 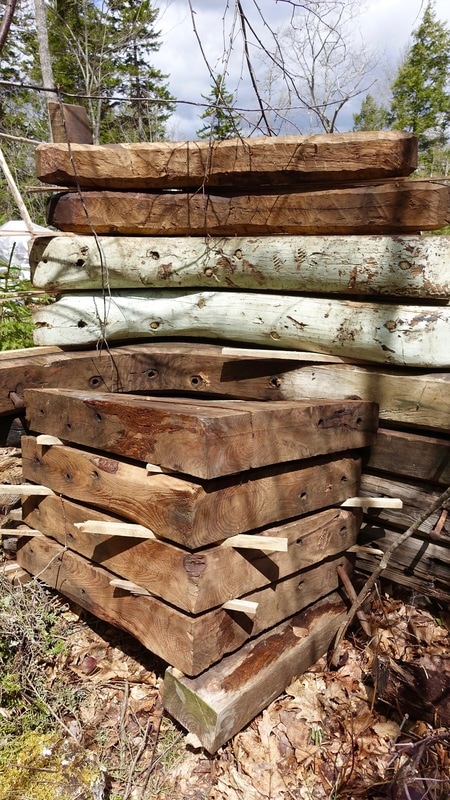 Larch or tamarack knees. These are grown braces that we’ll use to place in the building to prevent our timber frame from racking. Some of the limbs of these knees are over 3’ long. They’re pretty massive. The four posts in the middle of the workshop space, upstairs and down, will get knees to connect them to the second floor structure. You’d be more likely to hit your head on a brace, which is connected with 45 degree angles from the posts to the tie beams, and therefore intrude into the room a lot more, so we’re happy to have these beautiful knees instead. There were a lot of ship builders in this part of the country, and knees were used on ships to save space inside, so I think that some of those folks must have lent their skills to sawing knees for buildings as well as boats. 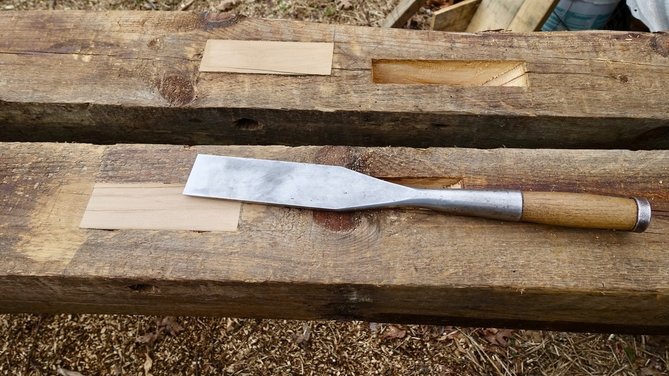 Filled mortises. Here I have filled an old mortise (one that we won’t be using) with a plug of wood. That’s so we won’t have so many voids in the post and it will be less confusing during assembly if we have mortise pockets only where we need them. 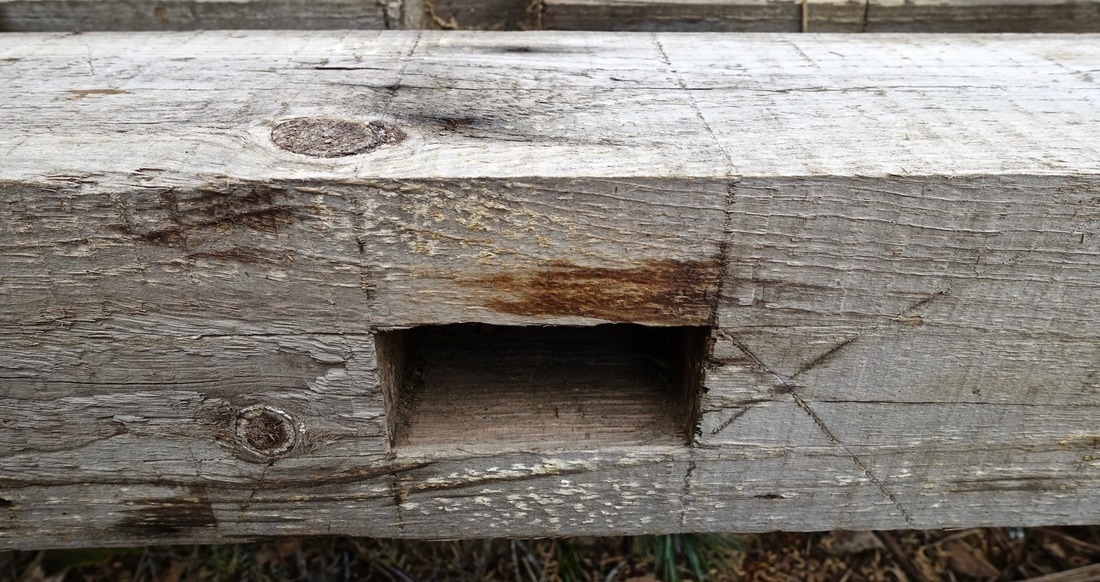 Layout lines from the 19th century. This photo shows a beam (clearly cut with a water powered saw mill) with an old mortise. The layout lines are interesting, the X shows that this is a place where the wood needed to be removed for a mortise. Especially interesting is that we have been re-using a lot of these old lines for our new layout, someone back in the 19th century often marked 2” in from the edge, just where we are needing a mark today. Angela asked me how I know what the different marks mean and how
I can estimate the ages of some of these elements. Huston, of course, would point things out to me when I visited and talked with him, but I have been doing work for a few years with Michael Alderson Restorations. Michael restores timber framed buildings in this area, occasionally with enough attention to detail to recreate a period correct frame. That is, if a structure had been repaired with newer wood, Michael’s team will remove those beams or boards and find vintage material to replace it with, so that a truly old house will be restored to the way it had be built before the Civil War. We had a lot of practice identifying the different ways which a timber frame had been sawn and worked." - KK
1 Comment
|
Authors:
Angela & Kenneth Kortemeier If you'd like to sign up for our email list, please follow this link:
The little button below (RSS feed) will allow you to
follow the blog without subscribing to the newsletter. Archives
March 2024
Categories |
 RSS Feed
Proudly powered by Weebly