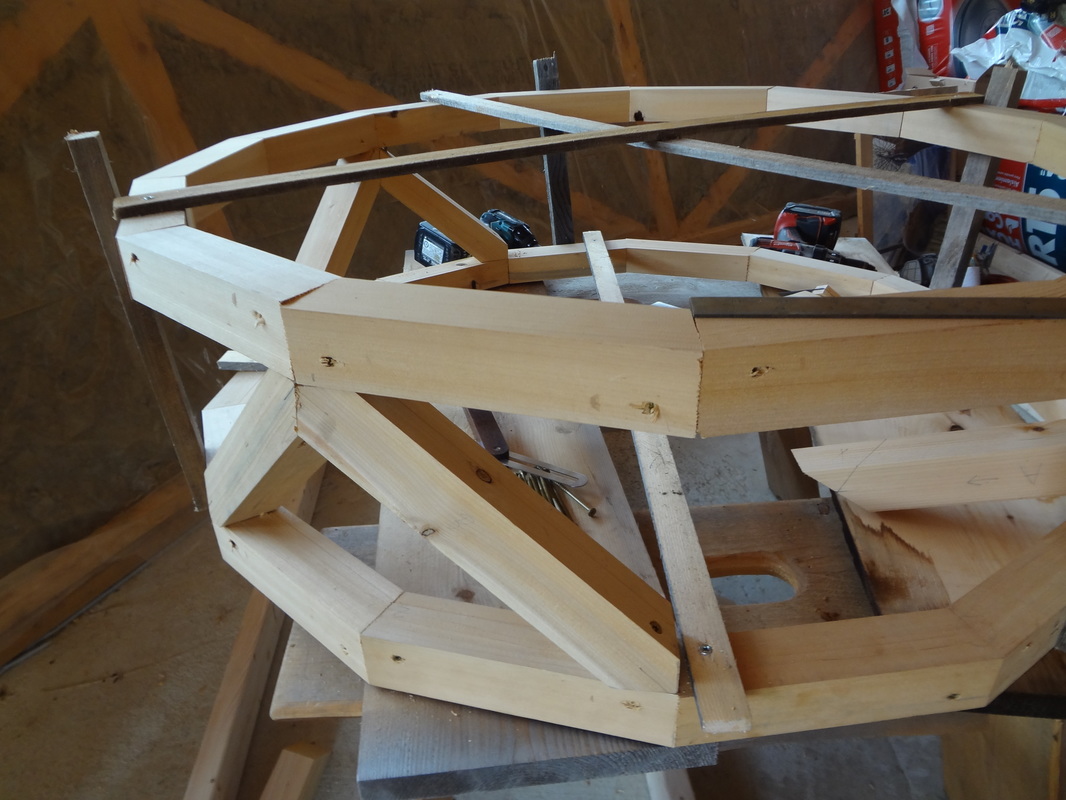
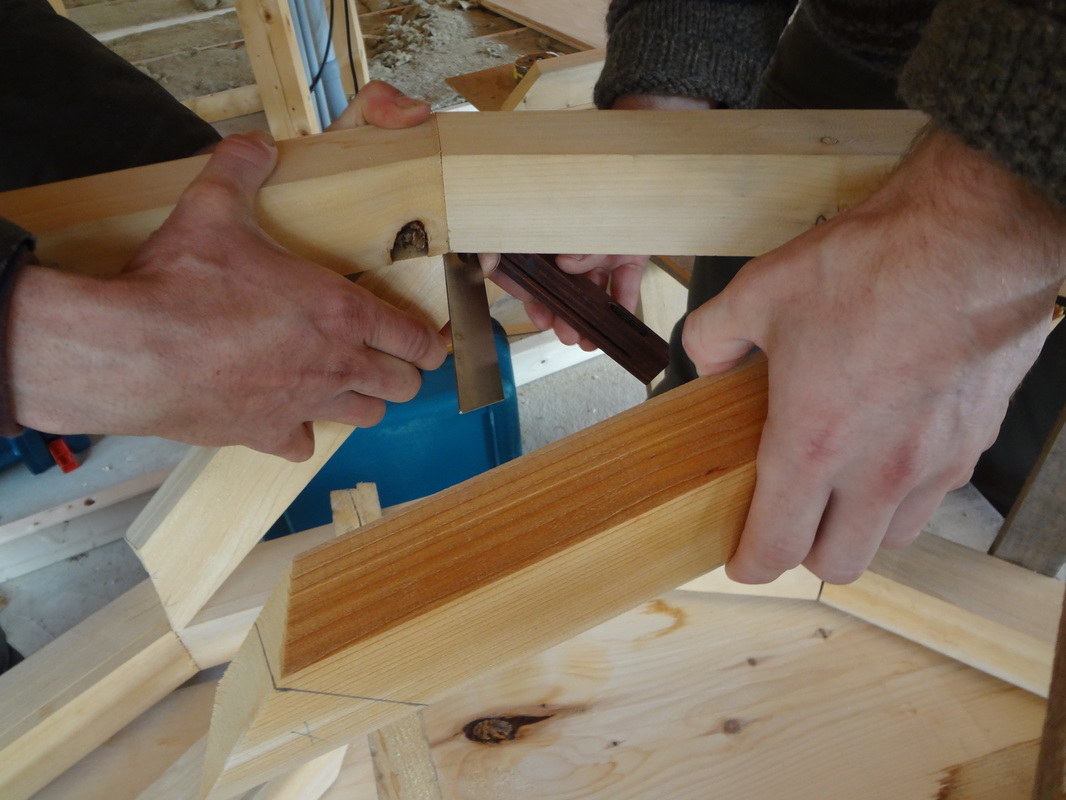
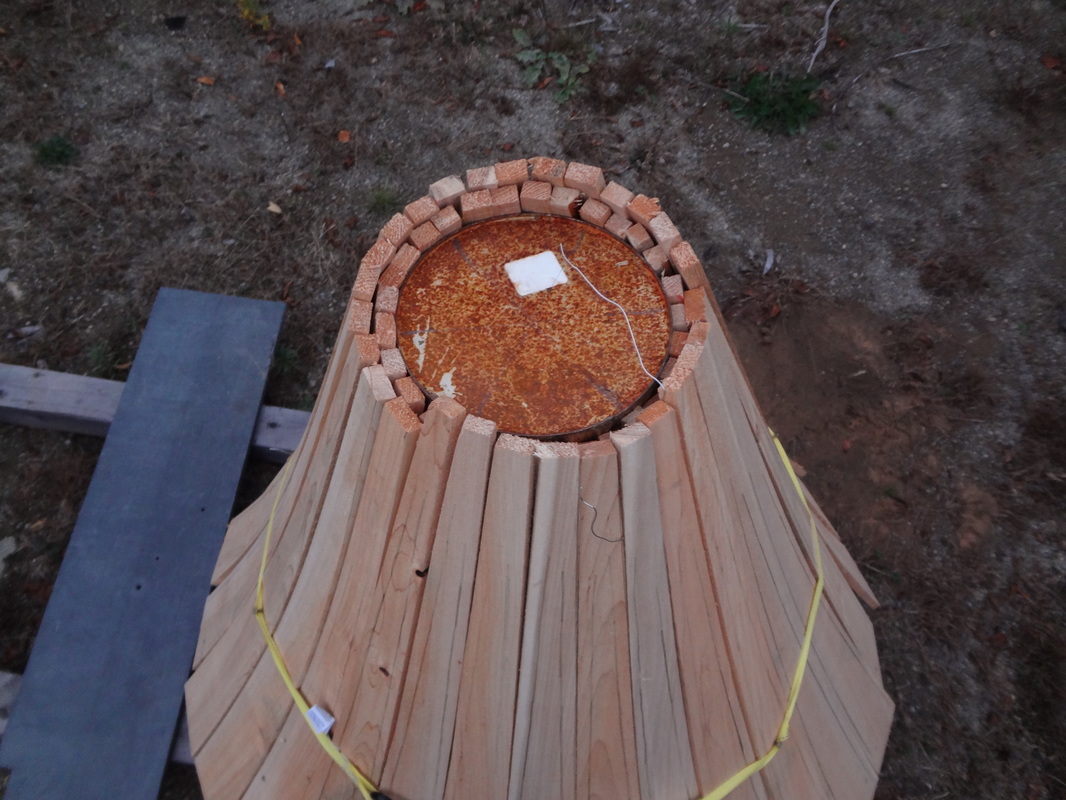
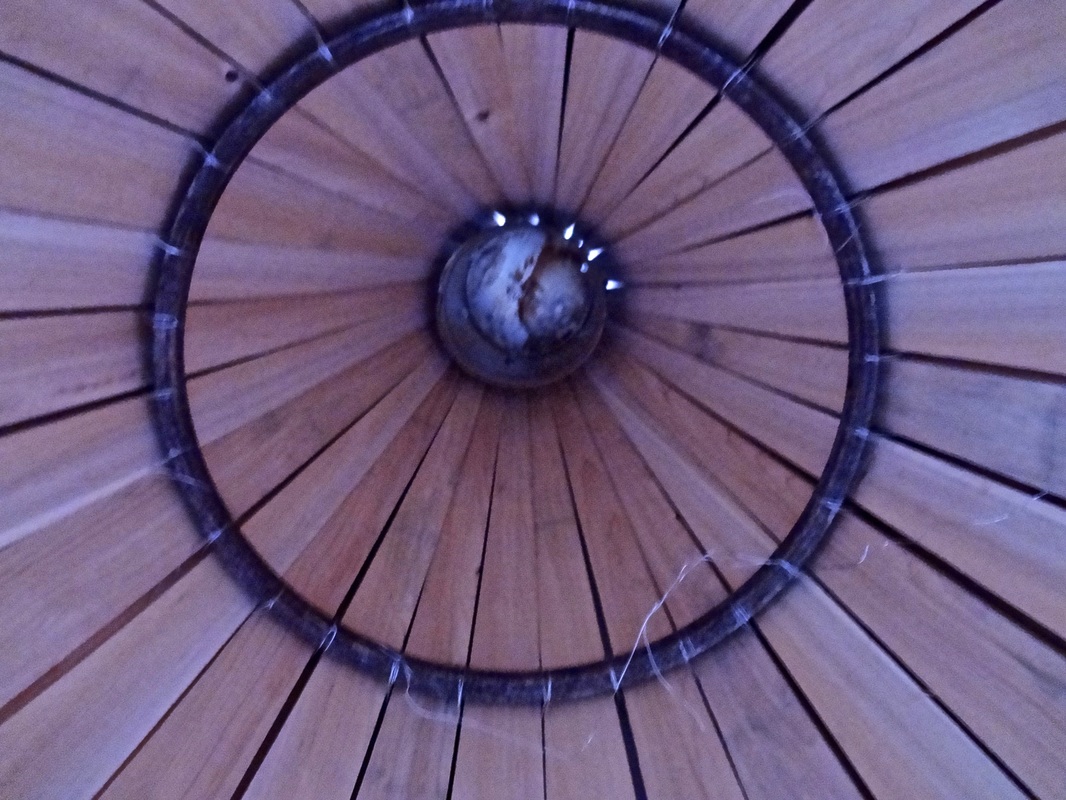
DESIGNING AND BUILDING A CUPOLA FOR A YURT 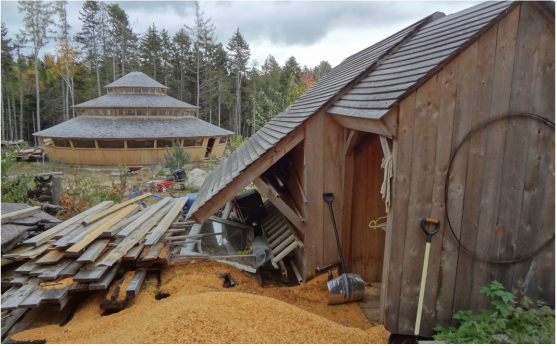 We went to visit our friends Melanie and Josh Wehrwein on the Blue Hill peninsula a few weekends ago. They are friends through Bill Coperthwaite, and have been building a three-tiered yurt which he designed for them over the past 3+ years. We participated in the initial construction phases of their home, spending a few weeks 2 1⁄2 years ago working with a group of friends to get the shell of it built. 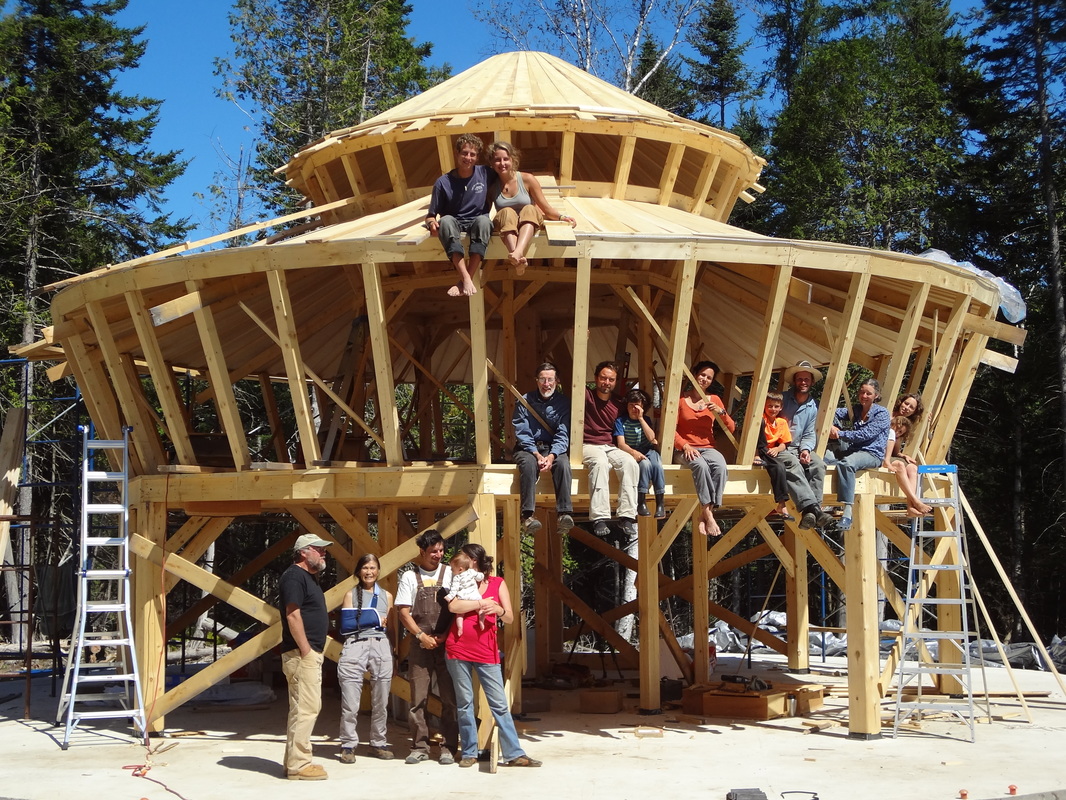 August 2014 Josh has been diligently working on all the details of finishing ever since, and finally their round home is almost ready for the family to move in. Check out Melanie’s blog, Circle In, if you’re interested in seeing more. Kenneth offered his assistance with a very special finishing touch, the cupola with a clerestory (or row of windows) which sits on the very top of the yurt. We were excited to help with this not just because it is such a nice bracket to helping with their project; to have started it and to now to help finish, but also because it was a good and tricky challenge to design and construct this little thing. So following is Kenneth’s description of how he, Josh Wehrwein and our friend Dan Asher created it together. "We started with the bottom ring of the clerestory window assembly. First we figured out the circumference needed by determining how it would look with the other three rooflines of the yurt. The size of the rough opening at the top of the highest tier (which they have had covered with plastic) gave us the minimum dimension. 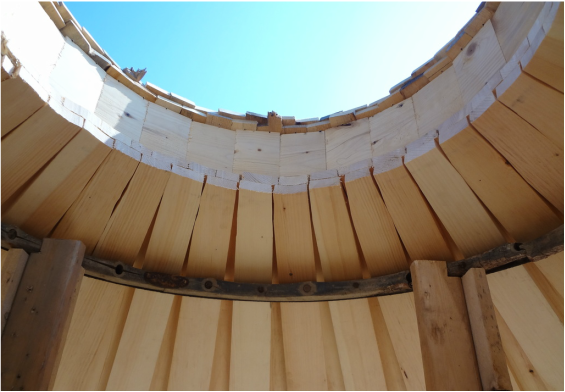 The rough opening at the top of the yurt, before the roofing was added. We decided that we didn’t want the ring of the clerestory to be too big because the windows wouldn’t show much if it was, and it couldn’t be too small since of course has to sit on top of the roof. So we made it only a few inches larger than the rough opening, to maximize being able to see the windows from inside the yurt. By making a full-scale drawing on a piece of cardboard, we could visualize how best to make this round thing out of straight, square cedar 2x2s, which Josh had milled up for us ahead of time. We drew the circle life-sized then divided it into 14 sections. By drawing a radial line from the center of the circle, we were able to get the angle of the butt-cuts for the 2x2 section pieces. Once we had cut all the pieces with the correct angle on each end, we butted them together and toe screwed them to one another to make the bottom ring. 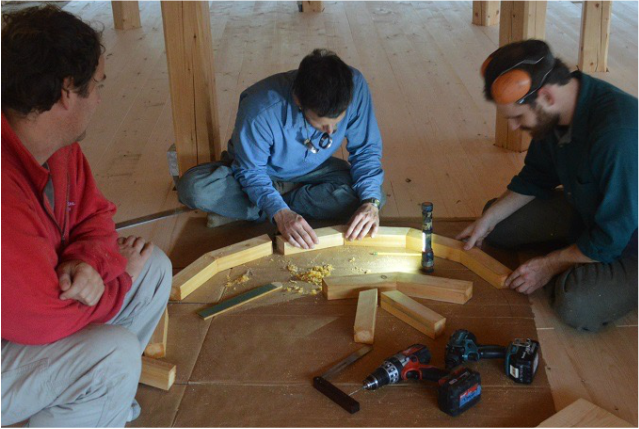 We repeated the same thing for the upper clerestory ring, drawing it full scale, getting the measurements and angles of the butt-cuts the same way. The top ring of the clerestory assembly is slightly larger though, it leans out a bit, mirroring the other windows in the yurt, so we were making two rings of different sizes. 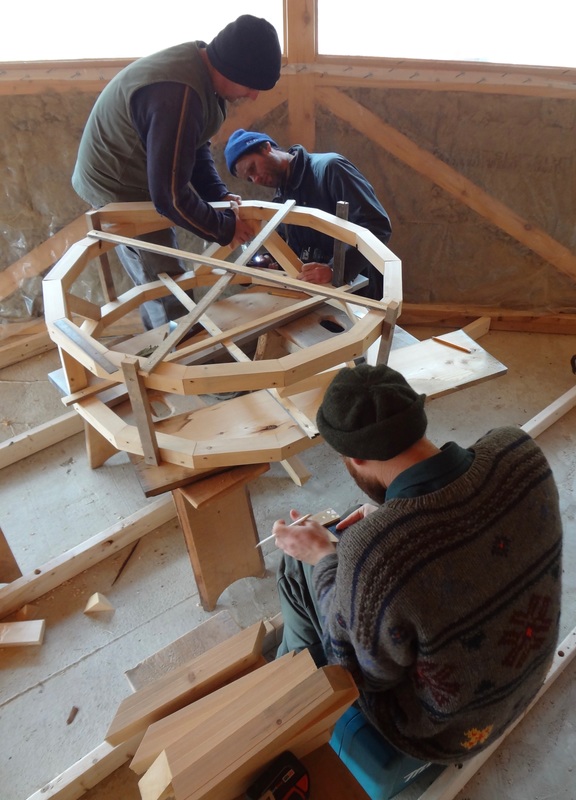 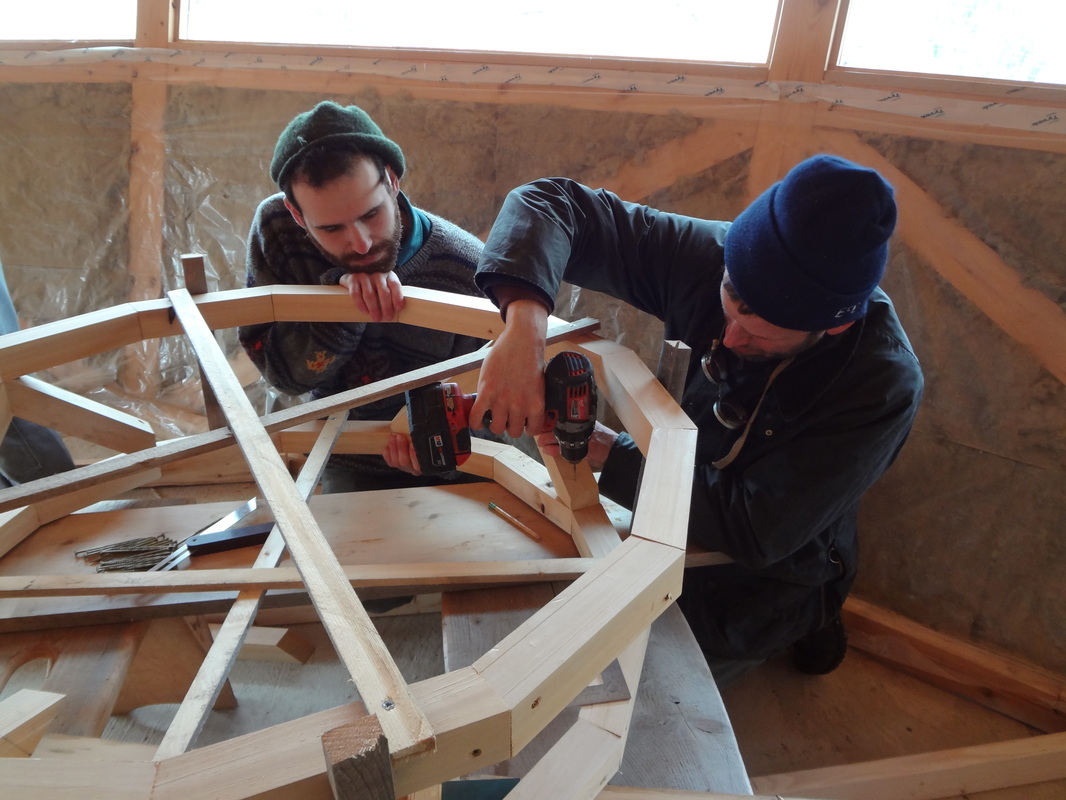 We temporarily connected the two rings together using 1x2s around the edge in four places. Then we began crafting the pieces that support the structure and which will border the glass windows. We chose to make triangular sections, which made for pretty complex cuts. I was glad that Dan was along with his boat building experience. He was able to scribe the sections with me and make sure, between scribing and visualizing the angles, that we were able to get all the pieces in accurately. We had the joints of the triangular sections end at the same butt joints as the clerestory rings. The pieces were miter cut, instead of having the ends come to a very abrupt point, thus the connections were bolder and made for a much stronger joint. 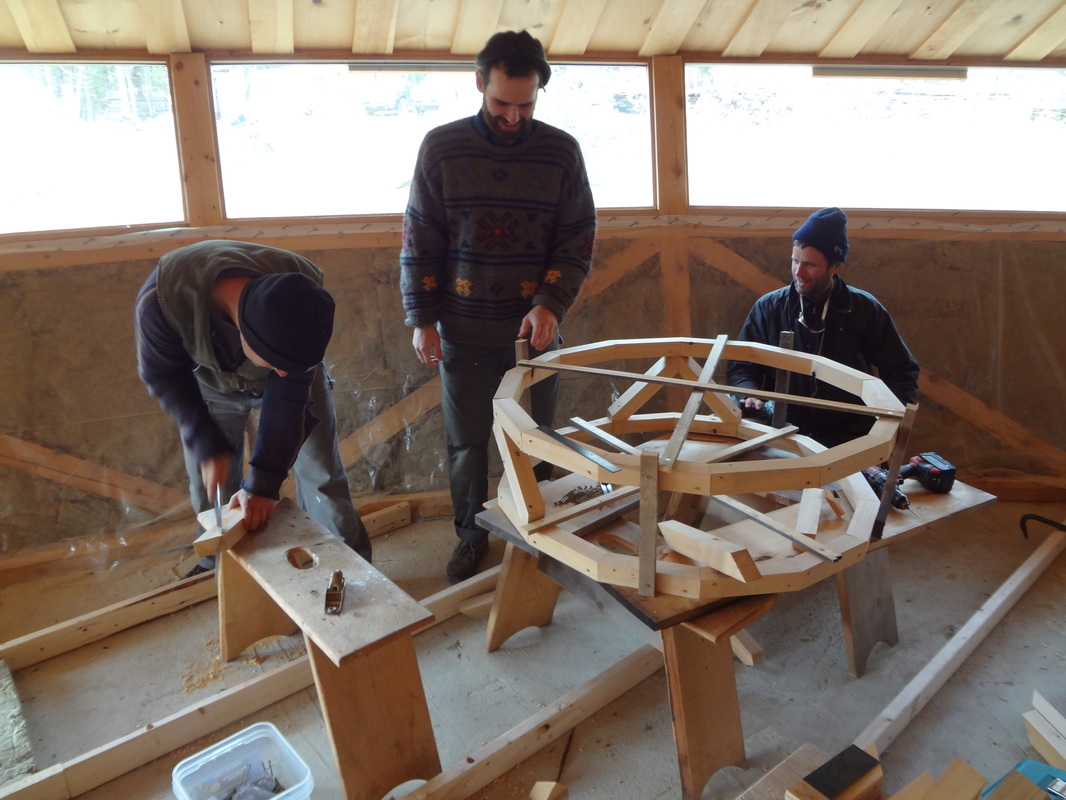 There was some head-scratching and re-making of pieces, this was definitely the trickiest part of the project. But we prevailed and in the end everything fit beautifully. Of course now Josh will have glass cut for the triangualr openings, but after his experience of doing all the trapezoidal windows in the rest of the yurt he should be able to get that done easily. These windows will be single paned, and they won’t open, so they are basically just for light. Next we needed to think about the roof on top of the clerestory windows. 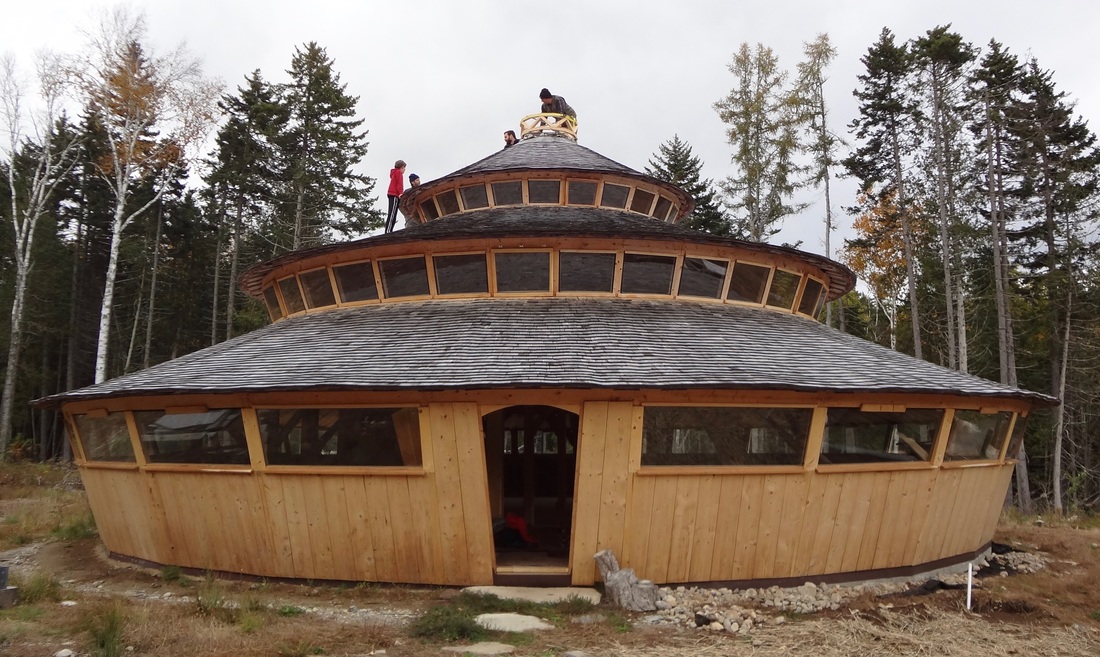 We brought the ring assembly up on the roof in order to visually determine the best height for this bit. Everyone was excited to get on the roof, especially the kids. Bill always liked concave curves in roofs, and he had described how he accomplished this to us during his “Yurt Design Symposium” just about a month before he died. It was fun to finally make one. We brought several sizes of circular things from home; a bicycle wheel, a piece from a bandsaw, a metal band from an old wagon wheel, since I didn’t know how big the cupola would end up being. The bicycle wheel turned out to be the right size for the middle ring on the inside of the roof section, this ring was going to be in tension and cause the concave bit of the curve. Josh had again prepared some cedar, this time they were strips about 4 feet long and a half inch thick. The very top of the roof section was smaller than we had anticipated, but luckily Josh had a metal bucket that was 9 1⁄2” which worked. We figured out how many strips would be needed to go around the top ring of the clerestory assembly and then made the top of the strips butt up nicely where we wired them to the metal bucket. Some of the boards needed some tricky fitting, in fact they needed to have something of a scalloped shape in order to allow them to be wired to the concave curve at the bicycle wheel. I used the table saw, but I could have used a draw knife and a spoke shave to do it by hand too. 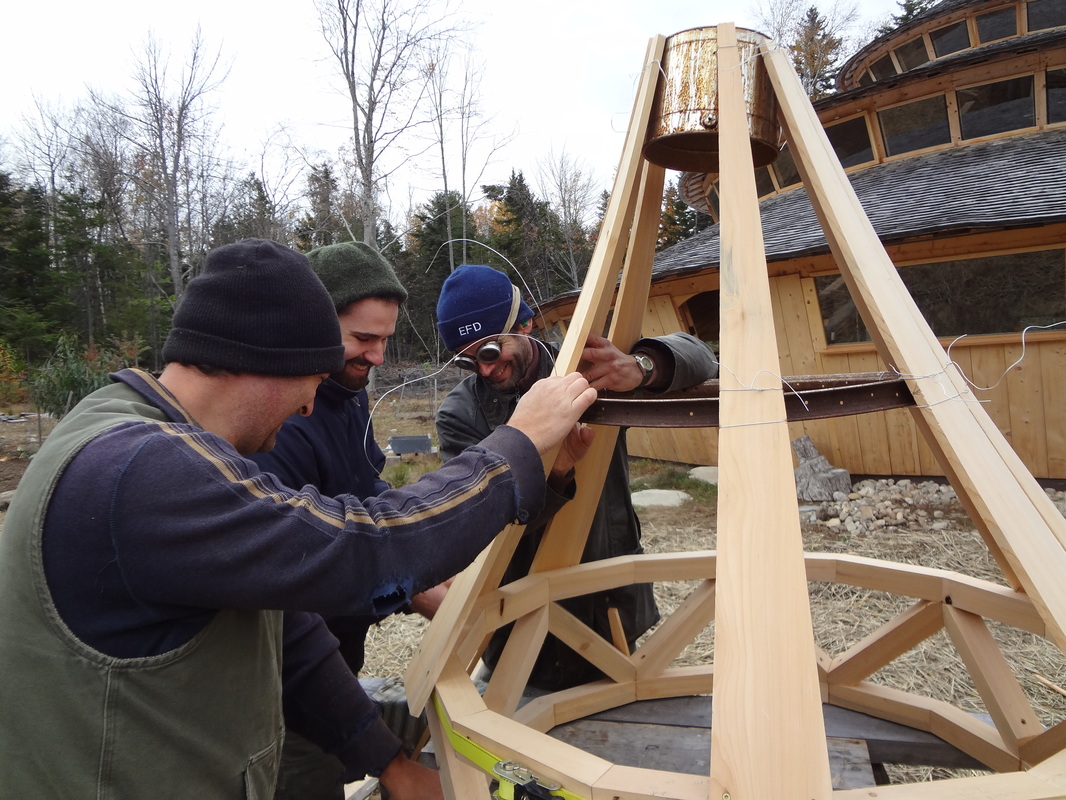 It takes two layers of strips (or roof sheathing boards). As you connect the two layers together you off-set the seams, and the two layers hold the curved shape under tension. Once we had the first layer of cedar strips all wired and screwed on, we added the second layer. These also had to be measured and cut to the taper, and with a scallop, in the same way as the first strips were. Unfortunately the cedar is so soft that any screws we were putting in were pulling right through the wood, so Josh is going to use copper rivets to attach the layers together, and then follow that up with some short screws. Ideally you wouldn’t have too many fasteners, or any fasteners at all showing on the inside, but these thin strips of cedar were so soft that the fasteners were basically just sinking right through the wood and the strips were not holding. Once the riveting and final shaping are done both the inner bicycle ring and the bucket can be removed by cutting the wires. The upper stays (around where the bucket is) will push tight together and you’ll have a strong compression ring formed by the edges of the boards touching each other." The Wehrweins will cover the very top with some kind of glass bowl to make a skylight (Bill was very creative in finding skylights, my favorite was from a front-loading washing machine), and Josh plans to shingle the cupola roof with cedar shingles to match the other three tiers. 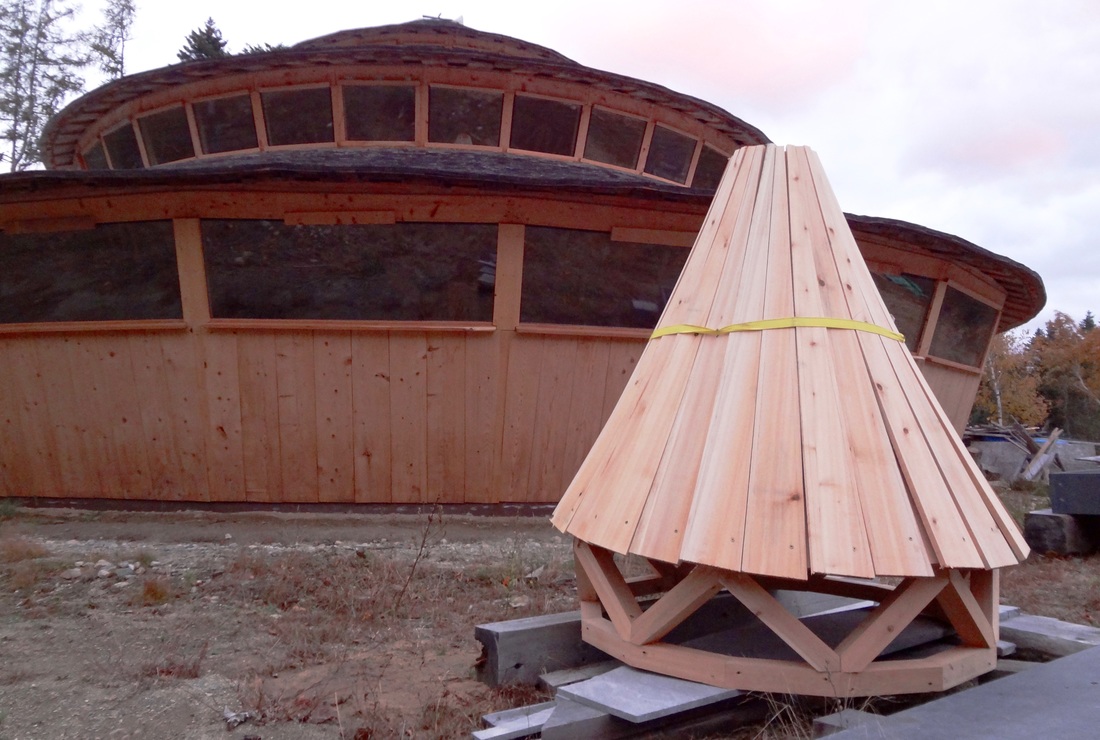 The concave curve will become evident once the two layers are riveted together. 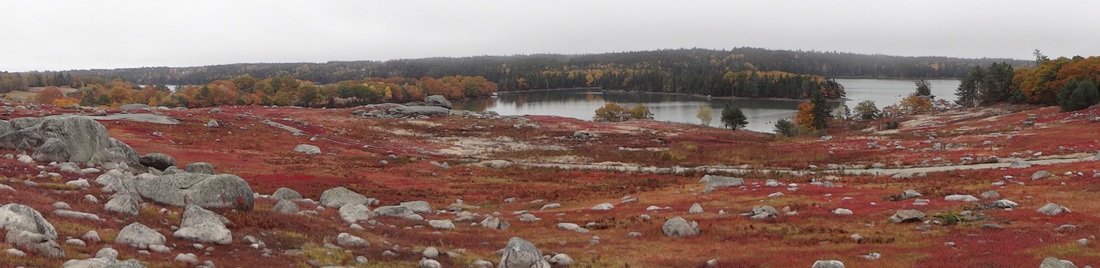 The low bush blueberries were feeling the season on the Blue Hill peninsula.
5 Comments
|
Authors:
Angela & Kenneth Kortemeier If you'd like to sign up for our email list, please follow this link:
The little button below (RSS feed) will allow you to
follow the blog without subscribing to the newsletter. Archives
March 2024
Categories |
 RSS Feed
Proudly powered by Weebly