|
It’s been just over three years now since our friend Bill Coperthwaite died in an automobile accident. 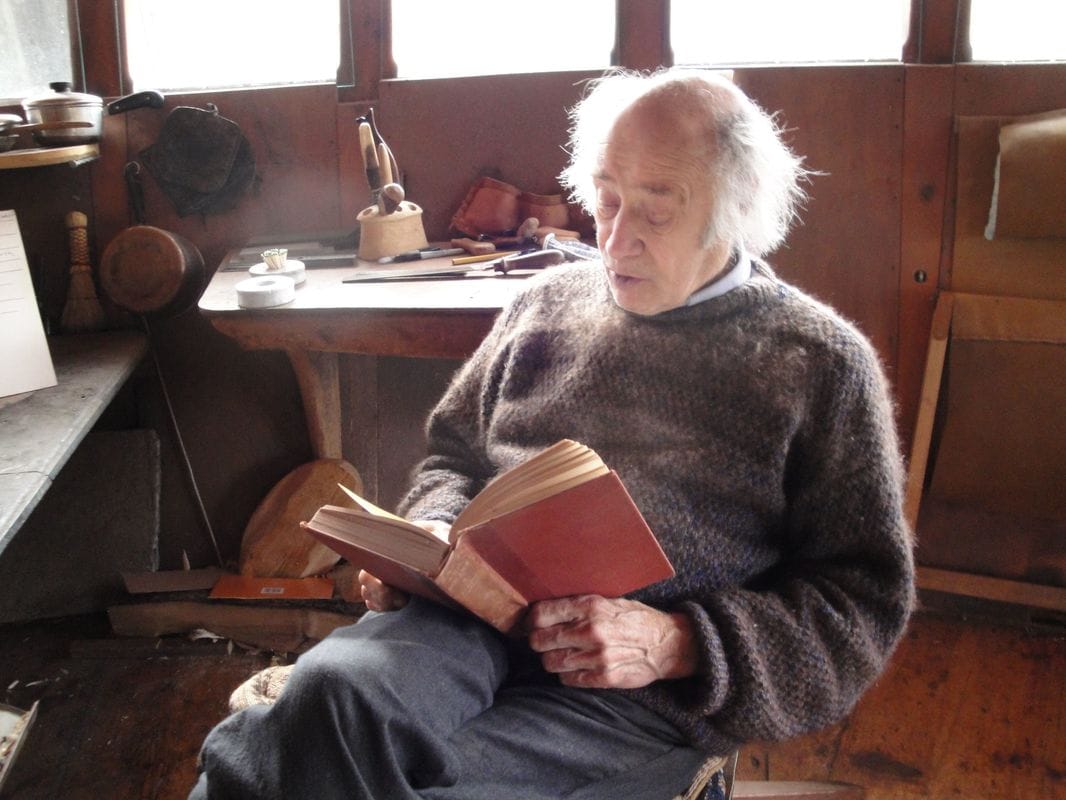 He was such an important, creative force in our lives and in this world, he was Kenneth’s mentor during the short years we knew him and his ideas and words continue to inspire us still. We appreciate the memories of him that pop up unexpectedly, and we foster any connection to friends or situations that remind us of him. Like this one - the annual Dickinsons Reach Calendar. 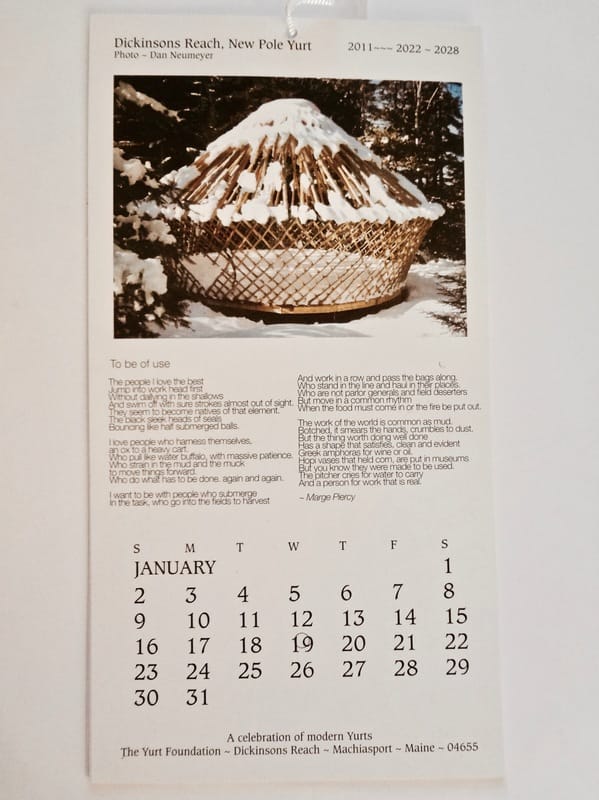 Bill produced and sold a calendar each year, the proceeds of which made up a majority of his annual income. He lived on very little, about eight thousand dollars a year. He led yurt building workshops, sold plans for building his yurts and one time he raised money for a trip by selling spoons which he carved, and he wrote a book, “A Handmade Life”. But overall, and fiercely, he chose to live on far less than the average American. One of his sayings was, “Tell me what you need and I will tell you how to get by without it.” 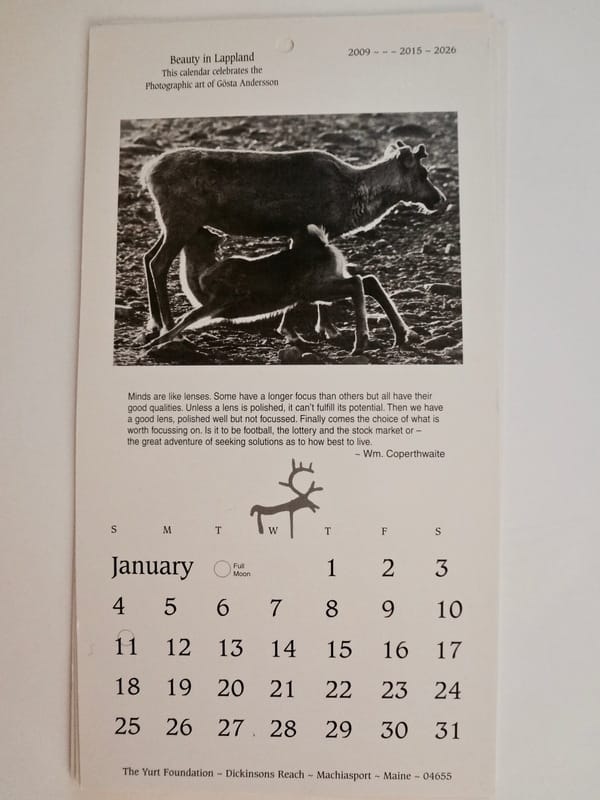 Bill had a very large group of people he corresponded with, all via letters. He had no phone and no computer, he did not have an email address, he loved writing and receiving real, paper mail. He would send out a letter to his entire mailing list each fall with a request for support and in exchange he’d offer his yearly calendar. Bill’s first letter was sent in the fall of 1973 to friends and supporters, it advertised two yurt plans and offered workshops, and it also included a list of recommended books. The first calendar was made a year later, illustrated with sketches of various yurts. It was printed on heavy brown paper and packaged in a cardboard tube. Sadly, I don't have one of those to show you. 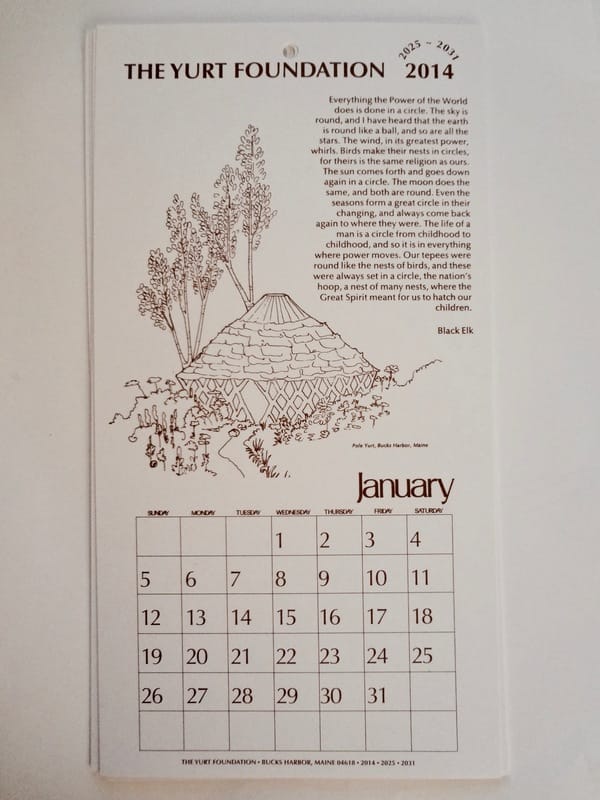 In successive years the paper and format of the calendar changed a few times, the most recent calendars were 11.5” tall by 6” wide, and some were printed in color. Bill always included favorite poems, quotes or sometimes sayings of his own, plus a number of book recommendations, his favorites from the past year. He would choose a theme for the calendar’s drawings or photographs - for instance, 2003 was a series of photographs of his yurts, and 2009 was ‘Beauty in Lapland, a celebration of photographic art by Gosta Andersson’. Or 2011 was a celebration of modern yurts. One year he chose illustrations by his favorite artist, Barbara Cooney. One of my favorite details of the calendar was that Bill listed several years for which they could be used (truly a thrifty guy). So it turns out that I can use my 1995 calendar again this year. 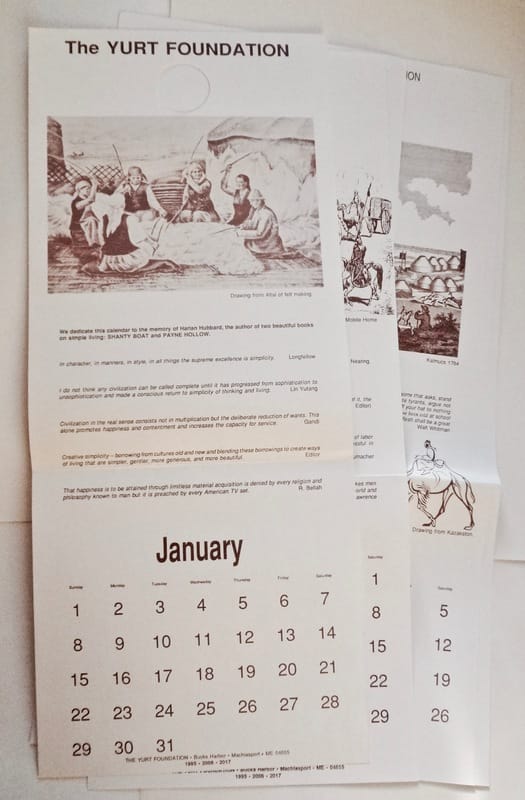 That’s the history of the calendars, and now for the way forward. Bill considered his group of closest friends to be his family, thus he entrusted his legacy and his land near Machiasport, Maine, to five dear friends. They are continuing to keep many of Bill’s ways of life and his philosophy alive. One of their tasks is to care for Bill’s remote homestead, called Dickinsons Reach (after his favorite poet, Emily Dickinson). They have just printed their second Dickinsons Reach calendar, proceeds from the sale of which will help to preserve and care for Bill Coperthwaite’s legacy. This year's calendar is luminous with those golden, quiet moments which embody the time I have spent at Dickinsons Reach. Margaret La Farge's paintings are gorgeous; they speak the truth of Bill's life of beauty and simplicity. All of the images are scenes from Dickinsons Reach. Consider joining the mailing list and supporting the Dickinsons Reach group's important, relevant and very interesting work. Below is this year’s letter with some links to more information. - AK 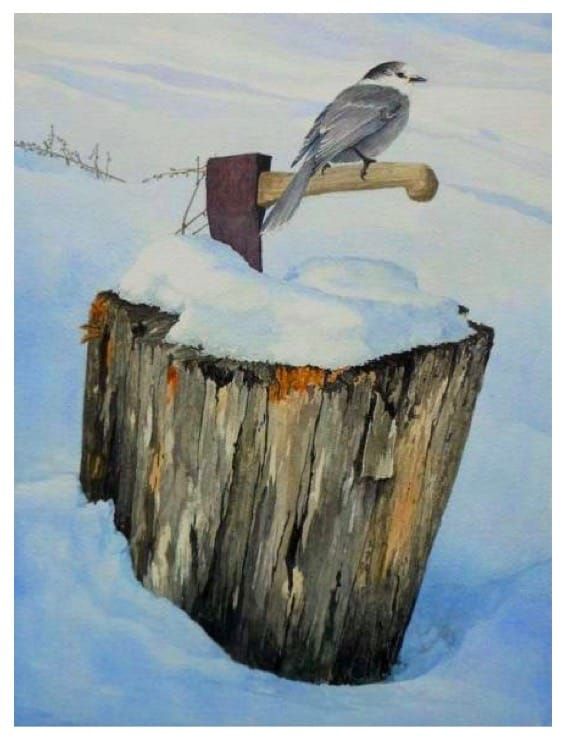 Sorry to Miss You – Margaret LaFarge The Dickinsons Reach Calendar for the Years 2017 ~~~~~~~~ 2023 and 2034 A celebration of Dickinsons Reach through the art of Margaret LaFarge Greetings from Dickinsons Reach Community, the far flung community of people that Bill Coperthwaite assembled during his life. We now work together – to care for Dickinsons Reach and to support excitement in simple living, meaningful work, beautiful creating. The 2017 Dickinsons Reach calendar will celebrate the art of Margaret LaFarge, who spent many hours with Bill in his home and has captured the spirit of the place in her paintings. The past year at Dickinsons Reach has been a busy one. Many friends and new acquaintances have walked or paddled in, and some stayed for a bit in the guest yurt. We continue to encourage visitors to be respectful and tidy, and to that end we are now implementing a reservation system for those who would like to stay overnight. Please contact us at [email protected] if you are planning a visit and want to schedule a stay in the guest yurt. We are also establishing a Homesteading Residency – 4-6 weeks at Dickinsons Reach for self-directed learning, discovery, service and creativity. We want to offer this amazing place as a setting for individuals, families and small groups to deeply explore nature, ideas and skills. We hope this opportunity will provide residents with encouragement on their life journey, time and solitude to explore ideas and skills, the joy and challenge of living with less, and the fulfillment of living in a healthy, wild place. We are pleased to announce that the first resident will be arriving at Dickinsons Reach in late November, 2016! Please write for a full description of the residency, or visit our website: www.insearchofsimplicity.net And, in place of Bill’s customary list of books, we remind all that Bill’s library has been catalogued: http://www.librarything.com/catalog/Dickinsons_Reach Hope is the thing with feathers That perches in the soul And sings the tune without the words And never stops - at all. ― Emily Dickinson $65 will bring you eight calendars $55 will bring six; $15 brings one Checks payable to Dickinsons Reach, LLC please. Mail to: 7 Page St, Brunswick, ME 04011 Proceeds from the calendar will go to support the land and buildings at Dickinsons Reach, to preserve this place for future visitors and inspiration. We encourage you to be in touch as you consider your own response to Dickinsons Reach, and the remarkable man who gave this gift to us all. 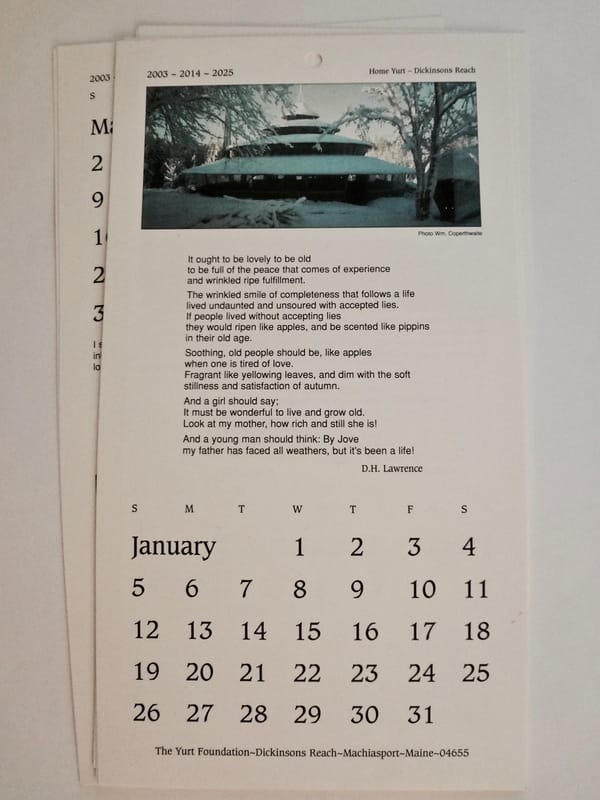
3 Comments
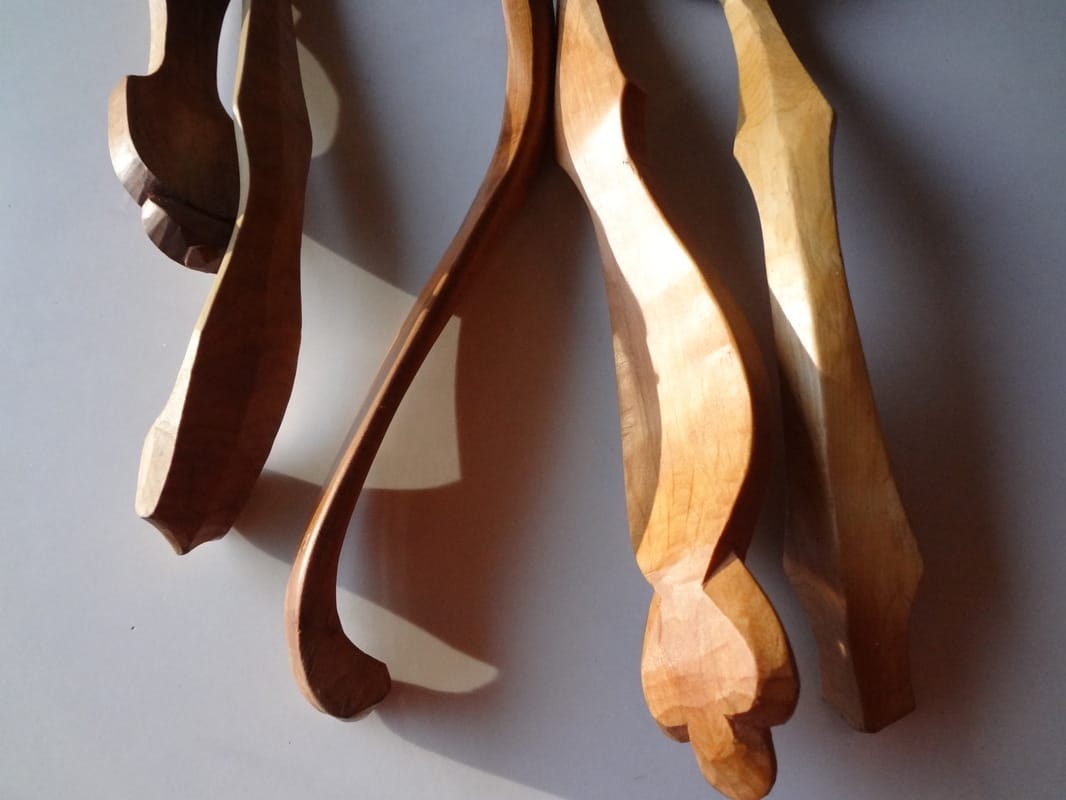 In the last blog entry Kenneth detailed how he finishes his Windsor chairs. This one is all about finishing his beautiful wooden spoons. We publish it here as an addendum to our workshops, where there is time to learn to make green wood items, but rarely time enough to do the oil finishes that will protect and preserve them. These blog entries are a guide to give complete information to our students and others who are looking for details of how to finish certain handcrafts. - AK I prefer to use raw tung oil on spoons, as opposed to the polymerized oil which is the finish I use on chairs, the polymerized is a bit more expensive. It is available from Lee Valley. Many people like to use raw linseed oil on spoons and bowls, I like the tung oil because it hardens off to a more durable and hard protection for the wooden ware. Jögge Sundquist told me that he likes linseed oil over tung oil because he says he doesn't like the way the tung oil smells. I don't think he has used it with the Citri-magic which has a lovely lemon or orange smell. Linseed oil is also a more traditional finish for wooden ware in Scandinavia. You can use polymerized tung oil if that’s what’s available, and I occasionally use it for a touch up on spoons, it is a finish that builds up layers fast. It is expensive to get enough to soak the spoons in it. For my standard spoon finishing, I cut the tung oil 50/50 with a citrus based solvent called Citra-magic, which makes the tung oil dry faster and allows it to penetrate better. Plus I think a natural solvent is a more pleasant way to thin the oil, and it smells really nice, like oranges. (I buy Citra-magic in bulk from the Shelter Institute here in Maine, or the Milk Paint Company also sells it.) There are citris based household cleaners that might confuse you so make sure it is a solvent and not a household cleaner. For my soaking mixture, I mix half raw tung oil and half solvent together in a large jar. I will soak any smaller items like spoons or butter/jam spreaders overnight with the jar’s lid on. If the item I’m finishing is too large to fit entirely into the oil I’ll drape a plastic bag over the top. Then I’ll invert the piece - I’ll do the bowl one night and then I’ll flip it around and do the handle the next night. 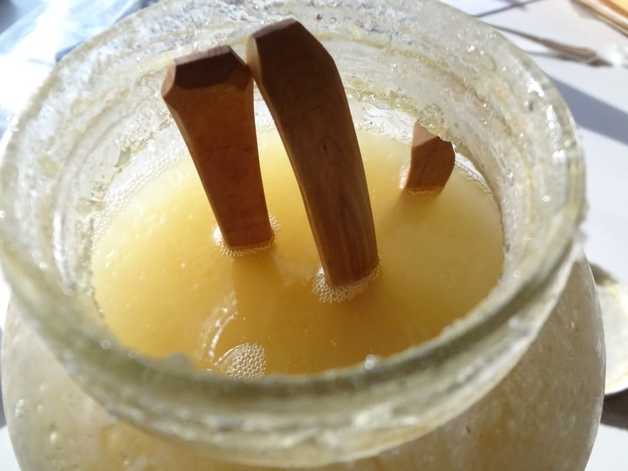 This overnight soaking is just for the first time, a really deep soaking, for when I’ve just completed carving a spoon and the wood has dried and I’m going to oil it for the very first time. I’ll do the overnight soaking once on the whole spoon, then when I remove it from the jar I use a small rag from a cotton T shirt to wipe off as much oil as I can. Then I take a second, dry rag and wipe off all the remaining oil with the dry rag. You want to rub it with a dry rag until there’s no more oil on the spoon. There actually is some on the surface, but you can’t really wipe off any more of it. important safety reminder: I always put rags that have tung oil on them into our wood stove, because when the tung oil oxidizes it gives off heat and if you have just the right conditions it can actually self combust. Because of this, I put my oily rags in our wood stove as a safety measure. You can also put them in water or put them outside, spread out (not wadded up). It’s mostly when they’re compressed and wadded up that they heat up, but if you spread them out the heat usually dissipates and they won’t catch fire, but either way they should NOT be left around the house or the shop. They can burn your house down.  make sure to dispose of oily rags properly! After the first application of oil has dried overnight, I like to wet the entire spoon down with water, which raises the grain of the wood. After that dries, I give the surface a light sanding to remove all the wood grain that has risen, either with 600 grit wet/dry sandpaper (you can even do a wet sanding with the oil to really finish it off nicely), or with 0000 synthetic steel wool. I will give my spoons just a light sanding between each coat of finish. You want to be careful not to sand through the finish as you build those coats, so don’t sand too aggressively or you might go back down through the layers you’ve been trying to build. After the initial soaking has dried, after raising the grain, drying the spoon again and after the light sanding, I’ll dip a rag in the oil/solvent mixture from the jar, wipe the spoon down with it and let it sit for 10 or 15 minutes. Then I wipe it off and repeat the process with the drying, light sanding and the rubbing/polishing.  You can get away with just one or two layers of finish, but when you start getting up to 3 to 5 coats it really starts to build up a smooth surface and that’s the kind of finish that I appreciate. I like the built-up tung oil surface because it makes the spoons perform and look better over the long run. Using and cleaning wooden spoons seems to go a lot easier when they have a nice slick finish on them. The water will literally run off the spoon when you wash it. The other day I was at the Shelter Institute and a gentleman was talking to me about how he’s been finishing his spoons using mineral oil, but he wasn’t super happy with his results. An important thing to know about mineral oil is that it never actually hardens off. What happens is that it’s always washing off the surface, every time you wash the spoon with soap and water or get it near hot water, the finish washes off the surface and then the wood becomes dry, and it will look it too. It really changes the way the spoon looks and feels against your skin. The pores of the wood and any indentations or marks from carving will tend to hold food and dirt if it’s got this kind of soft surface. It’s like putting olive oil or something similar on the wood. I’ve found that the tung oil finish holds up much better than mineral oil or similar kinds of oils that don’t actually harden off. 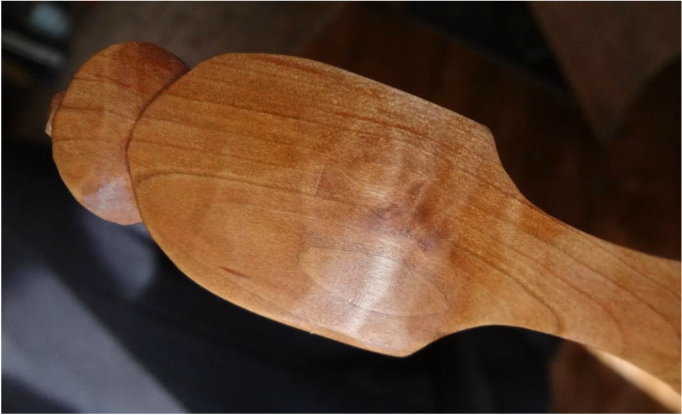 The idea of toxic finishes on spoons and bowls is a big concern for people, of course. (I really appreciate the Citra-magic for that reason, it’s nice to know that I’m not putting anything with strong chemical dryers on my spoons.) My understanding is that almost any finish, when it’s totally cured and dried, is going to be nontoxic and inert, especially if you wash your spoon with soap and water after you’re completely done finishing it and after the finish is fully cured. When your wooden ware is in daily use, the finish has to be reapplied occasionally, not all that often, but it does seem to wear over time so I do reapply the finish periodically. It’ll just build up more and more and your spoons will benefit from more protection. I think you’ll find with a finish that hardens off like tung oil does, you’ll be able to build up a surface that doesn’t require maintenance as often. some thoughts about containers - I have found that a large jar is the most durable, reusable and easy to seal container for the tung oil finish, but there are other ways to hold oil finish for spoons. Drew Langsner (at Country Workshops) was using a tray which he had made out of a big rectangular olive oil can by cutting the top off and leaving a lip about 4” high. He would pour his oil in there (he also uses tung oil), set spoons in it and then place a weight on top of the spoons to push them down below the surface. Once he was done soaking the spoons or butter spreaders, he’d pour the liquid back into a jar to re-use it later. If you don’t happen to have a jar or a can that’s large enough to do a really big spoon, I discovered an alternative this past summer which may help. You can use a large plastic bag instead and fill it with the tung oil/Citra-magic mixture, place your item to be oiled in the bag, squeeze the air out, seal it up and just let it soak there for a day or two. Then you can pour the finishing liquid out into a jar when you’re done in order to store it longer term. Unfortunately you’ll end up wasting some because you can’t really get it all out of the bag. But if you squeeze all of the air out of the plastic bag and seal it up, free from air, you can re-use your plastic bag quite a few times. 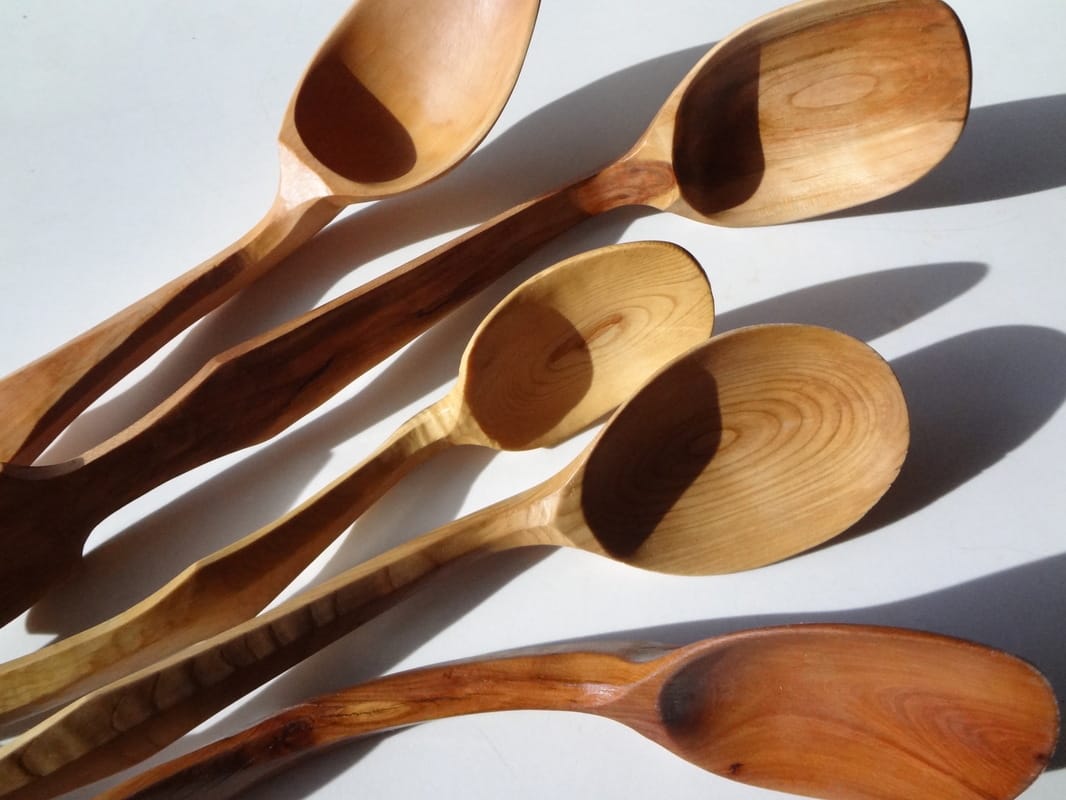 And finally, here’s another type of finish I like a lot -
I used to finish my spoons with a polymerized linseed oil finish called Tried and True, there's one that has beeswax in it, it’s the ‘original’ Tried and True finish. I would coat the spoon with that, then I’d put it in the microwave for 5 to 10, maybe 15 seconds on high, until the spoon was really warm. The microwave would heat the spoon up from the inside and draw the oil and beeswax mixture into the wood. I used that finish on a lot of spoons. But now we live off the grid and we don’t have a microwave, so I switched. I think the finish soaks in better with the overnight method, and the tung oil creates a harder, less permeable finish on the wood as compared to linseed oil and so that is now definitely what I prefer.” - KK Finishing a handmade rustic welsh windsor chair 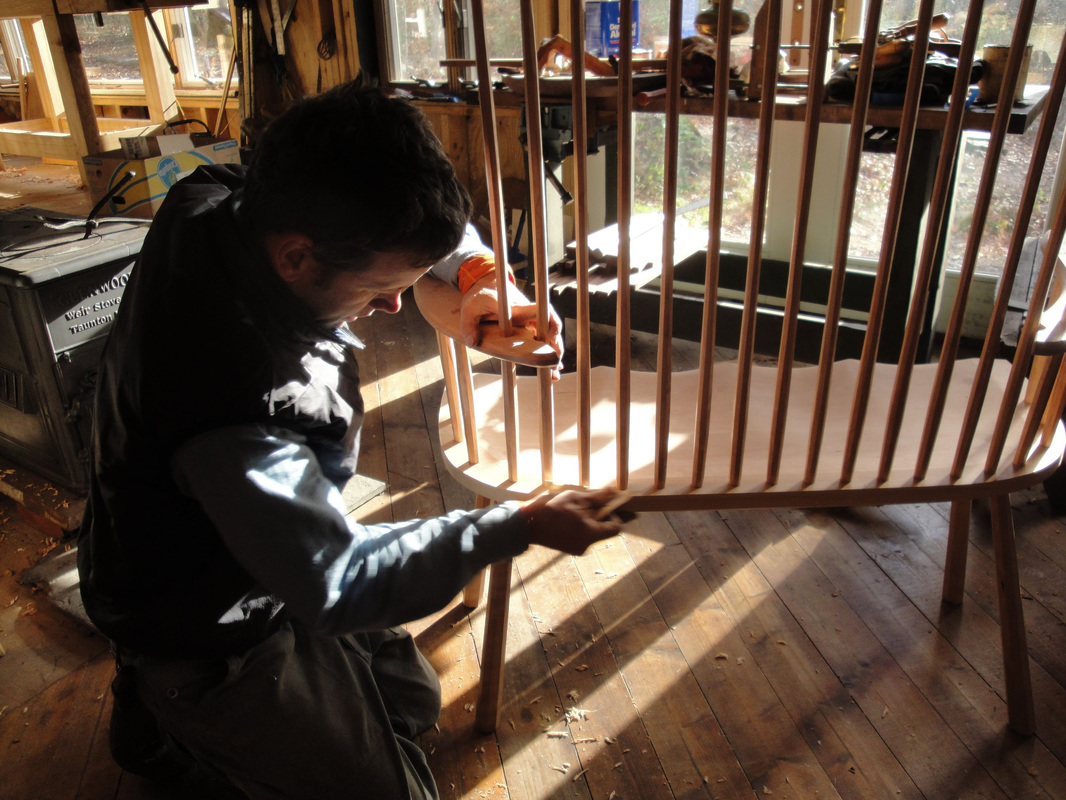 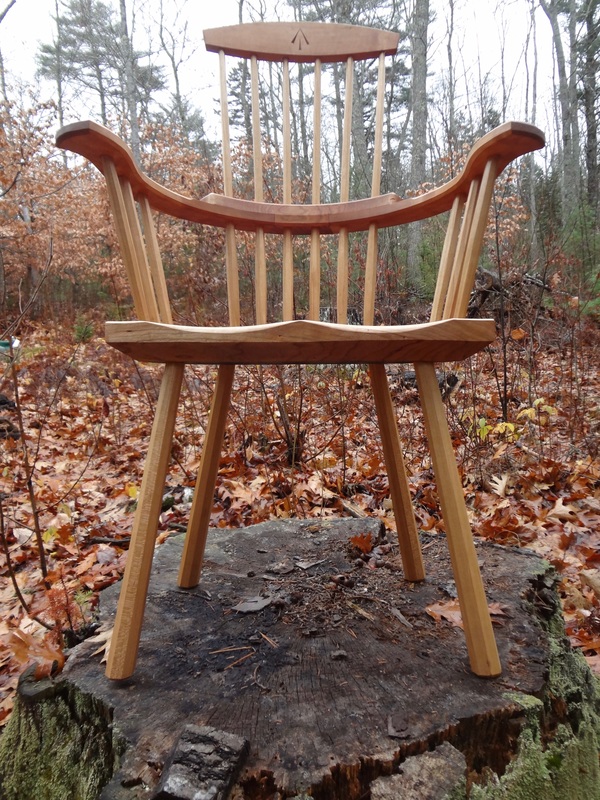 Just last week Kenneth completed a commission for one of his Welsh vernacular style Windsor chairs, that is one of the chairs he learned to make from his teacher, the late John Brown, in the rustic and distinctly handmade Welsh style. We’ll work on telling more about this Welsh lay person’s Windsor and about how Kenneth came to be John Brown’s “first and last apprentice”, so stay tuned for that. This current entry though will be something of a hands-on post about how Kenneth finishes his chairs. I have seen that his finishing methods change slightly from year to year, he’s always investigating best methods and making adjustments. So here’s what happened with his latest chair. -AK “I use a simple oil finish which wears well and is very straight forward to apply. Some finishes will yellow with the sun but I think that this finish doesn’t yellow as far as I can tell. And it doesn’t build up on the surface so you can really feel the wood through it. I’ve tried a lot of different oils, the Sam Maloof oil finish, Tried and True, Danish Oil Finish to name a few. But I’ve recently been liking the polymerized tung oil that Lee Valley is selling. They also have a polymerized tung oil sealer, which is basically the tung oil with more dryers added so it’s a lot thinner. You can put the sealer on your piece first and it helps the wood to not absorb quite as much oil. You can also add the sealer to the straight polymerized tung oil to thin it out a little bit to make it easier to wipe it on and off, but then since it’s thinner it takes more of it to build up the coats for a good finish. I usually apply the sealer first and after 24 hours, I apply the high luster polymerized tung oil. I do not dilute the oil. It’s generally thin enough that I don’t have any problem wiping it on and off again before the oil starts to tack up. After the sealer is dry, I give it a light sanding. I like the synthetic steel wool, the 0000 is a good variety. If the grain has risen in any place, which it does sometimes, I’ll hit it with 600 grit wet-dry sandpaper. If it’s really severe I might use something more like 400 grit wet-dry sandpaper, or 320 even. After this, I work back up through the grits, so that I finish with the 600 grit. I then wipe it all down with a tack free cloth, because once the sealer has dried you’ll get a white powder that needs to be removed. The white powder will form while sanding if the sealer or oil is dry. If you’re not getting the white powder you’ll know that the sealer and/or the tung oil is not quite dry. So after the sealer has dried and gotten a light sanding and been tacked off, I’ll start with a first layer of the high luster polymerized tung oil. I wear nitrile gloves and use a cotton rag that I fold up so that the lint doesn’t come off of it. Old T-shirts work well, just fold the corners in so that the cut edge doesn’t fray and leave lint on your piece. But it’s a really nice finish because even if you do get a little lint in there or a little dust or if something lands on your piece as it’s drying, you then just wipe it all off, again with a lint free cloth. 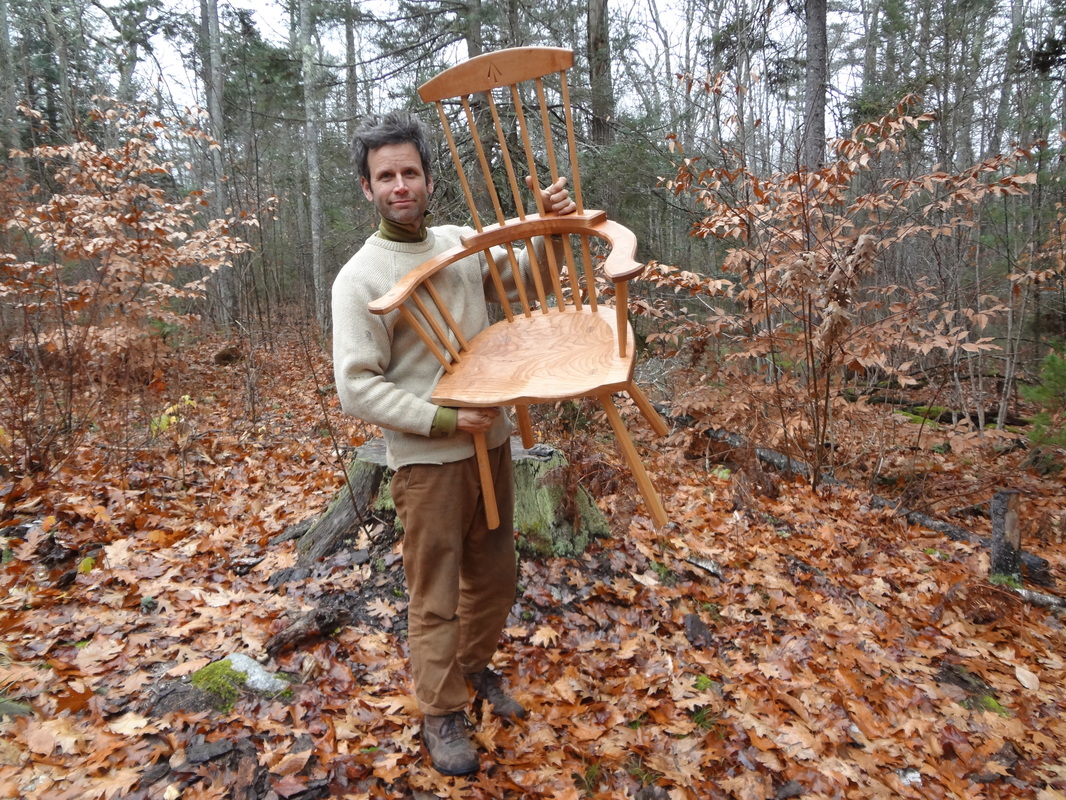 I let the tung oil sit on there at least 10 minutes, usually by the time you’ve finished applying the oil to one part of the chair, it’ll be time to start wiping down the parts of the chair where you started applying the oil first. I usually wipe and buff it enough so that it doesn’t feel like the rag is dragging any more, I really want to get all the oil off that isn’t soaked into the surface. I might apply a little bit more on the end grain to help that seal in. I let the first coat of high luster, polymerized tung oil dry for 24 hours. Usually I don’t have to use the sandpaper anymore, at this point I just use the 0000 or 000 grade synthetic steel wool, and I buff the oil. And then I do another coat - ideally I do 3 coats of oil like that. And then after all that’s dried, if you really want to buff it up nicely you can use a little bit of a paste wax finish on the chair. I usually just use the paste wax on the high wear areas, like the seat and the tops of the arms and maybe the comb. I don’t usually do the paste wax except on the high-wear areas because I find the paste wax is kind of hard to get off around all my spindles, especially since I leave the spindles faceted.  You can reapply the oil over time if the piece gets scratched or needs to be brightened up again. Or if you ever need to you can wipe the surface down with a little denatured alcohol, to get the paste wax off, and then you can apply more polymerized tung oil, maybe after giving it a light scuffing with some synthetic steel wool or some sandpaper and you can apply another coat in years to come. So it’s an easy to maintain finish over time, although I find that it seems to hold up well, even without doing that. It just gets better over time. I’ve used this finish on a very white birch chair and it looks lovely, the birch has mellowed a little bit, gotten warmer in tone over time, but the finish stays nice and clear and I haven’t had any trouble with it at all. 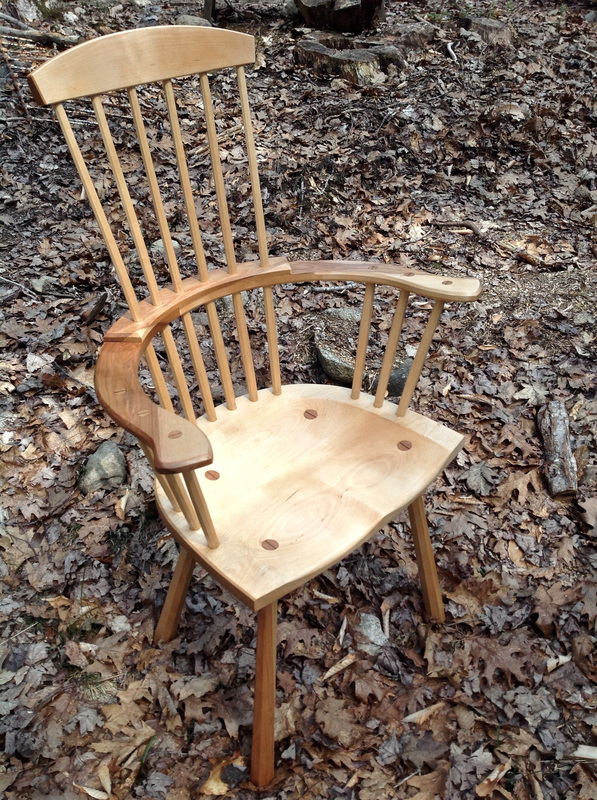 the birch Windsor One challenge I’ve had has been in the long term storage of opened cans of polymerized tung oil finishes. They will oxydize when exposed to air, as any oil finish will, so trying to store an open can of this stuff and not have it oxidize and set up in the can has always been a problem. I have tried something called "Blocksoygen", which is a can that sprays gas into an opened can of finish or paint to replace the oxygen (with something non-reactive). I have also had collapsible ridgid containers that are shaped like an accordian that you can push down to get the oxygen out. But even so, I’m always finding my tung oil sets up and gets wasted. A couple of months ago, I found these plastic ‘Stop Loss’ bags (from Lee Valley). They look a lot like a plasma blood bag that you might see used at a hospital for an IV. When I saw these flexible bags I was impressed and thought they may be a really good solution to my problem. You can compress them as you use the liquid so there is no air in the bag at all. So far they have been working great.” - KK 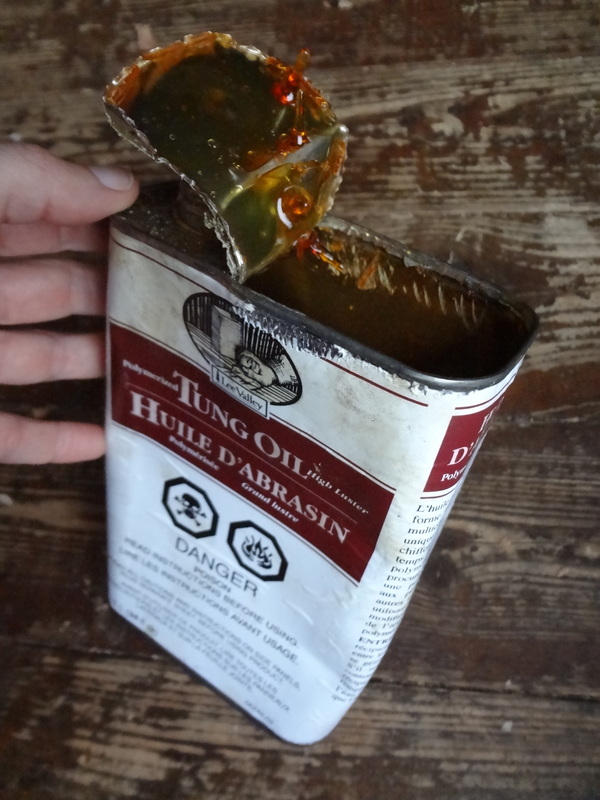 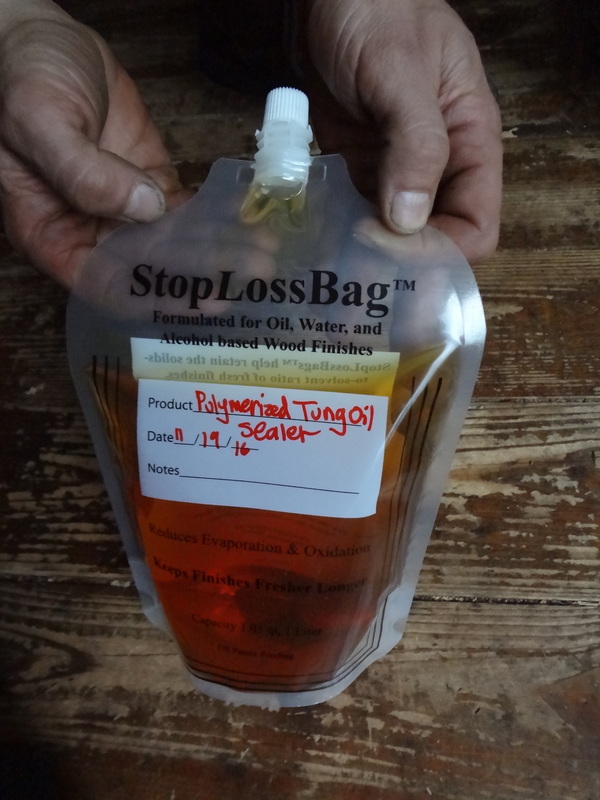 Next up: how Kenneth finishes smaller items like spoons & bowls, which is a similar but slightly different process. “Handmade work has soul, it has verve, a sparkle which a machine cannot reproduce.” |
Authors:
Angela & Kenneth Kortemeier If you'd like to sign up for our email list, please follow this link:
The little button below (RSS feed) will allow you to
follow the blog without subscribing to the newsletter. Archives
March 2024
Categories |
 RSS Feed
Proudly powered by Weebly