Finishing a handmade rustic welsh windsor chair 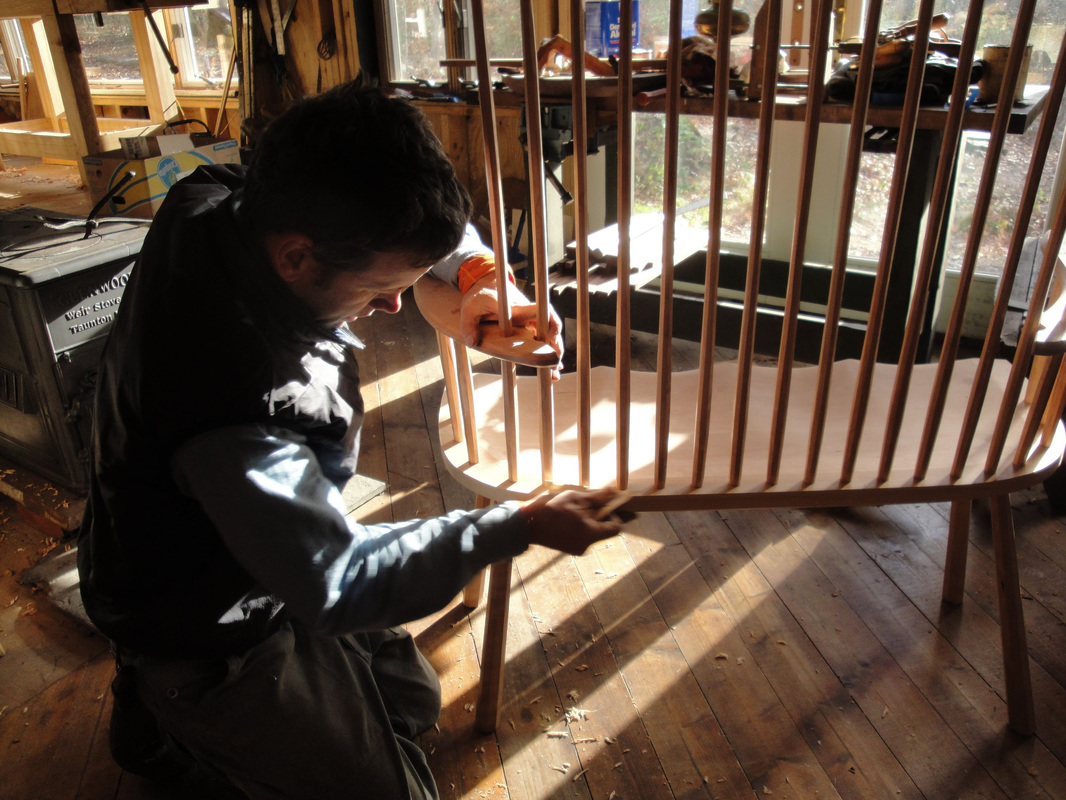 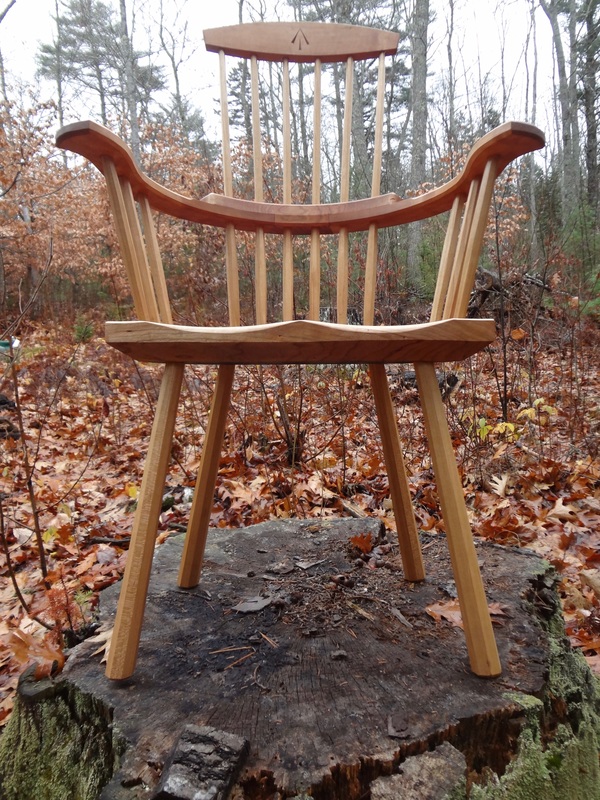 Just last week Kenneth completed a commission for one of his Welsh vernacular style Windsor chairs, that is one of the chairs he learned to make from his teacher, the late John Brown, in the rustic and distinctly handmade Welsh style. We’ll work on telling more about this Welsh lay person’s Windsor and about how Kenneth came to be John Brown’s “first and last apprentice”, so stay tuned for that. This current entry though will be something of a hands-on post about how Kenneth finishes his chairs. I have seen that his finishing methods change slightly from year to year, he’s always investigating best methods and making adjustments. So here’s what happened with his latest chair. -AK “I use a simple oil finish which wears well and is very straight forward to apply. Some finishes will yellow with the sun but I think that this finish doesn’t yellow as far as I can tell. And it doesn’t build up on the surface so you can really feel the wood through it. I’ve tried a lot of different oils, the Sam Maloof oil finish, Tried and True, Danish Oil Finish to name a few. But I’ve recently been liking the polymerized tung oil that Lee Valley is selling. They also have a polymerized tung oil sealer, which is basically the tung oil with more dryers added so it’s a lot thinner. You can put the sealer on your piece first and it helps the wood to not absorb quite as much oil. You can also add the sealer to the straight polymerized tung oil to thin it out a little bit to make it easier to wipe it on and off, but then since it’s thinner it takes more of it to build up the coats for a good finish. I usually apply the sealer first and after 24 hours, I apply the high luster polymerized tung oil. I do not dilute the oil. It’s generally thin enough that I don’t have any problem wiping it on and off again before the oil starts to tack up. After the sealer is dry, I give it a light sanding. I like the synthetic steel wool, the 0000 is a good variety. If the grain has risen in any place, which it does sometimes, I’ll hit it with 600 grit wet-dry sandpaper. If it’s really severe I might use something more like 400 grit wet-dry sandpaper, or 320 even. After this, I work back up through the grits, so that I finish with the 600 grit. I then wipe it all down with a tack free cloth, because once the sealer has dried you’ll get a white powder that needs to be removed. The white powder will form while sanding if the sealer or oil is dry. If you’re not getting the white powder you’ll know that the sealer and/or the tung oil is not quite dry. So after the sealer has dried and gotten a light sanding and been tacked off, I’ll start with a first layer of the high luster polymerized tung oil. I wear nitrile gloves and use a cotton rag that I fold up so that the lint doesn’t come off of it. Old T-shirts work well, just fold the corners in so that the cut edge doesn’t fray and leave lint on your piece. But it’s a really nice finish because even if you do get a little lint in there or a little dust or if something lands on your piece as it’s drying, you then just wipe it all off, again with a lint free cloth. 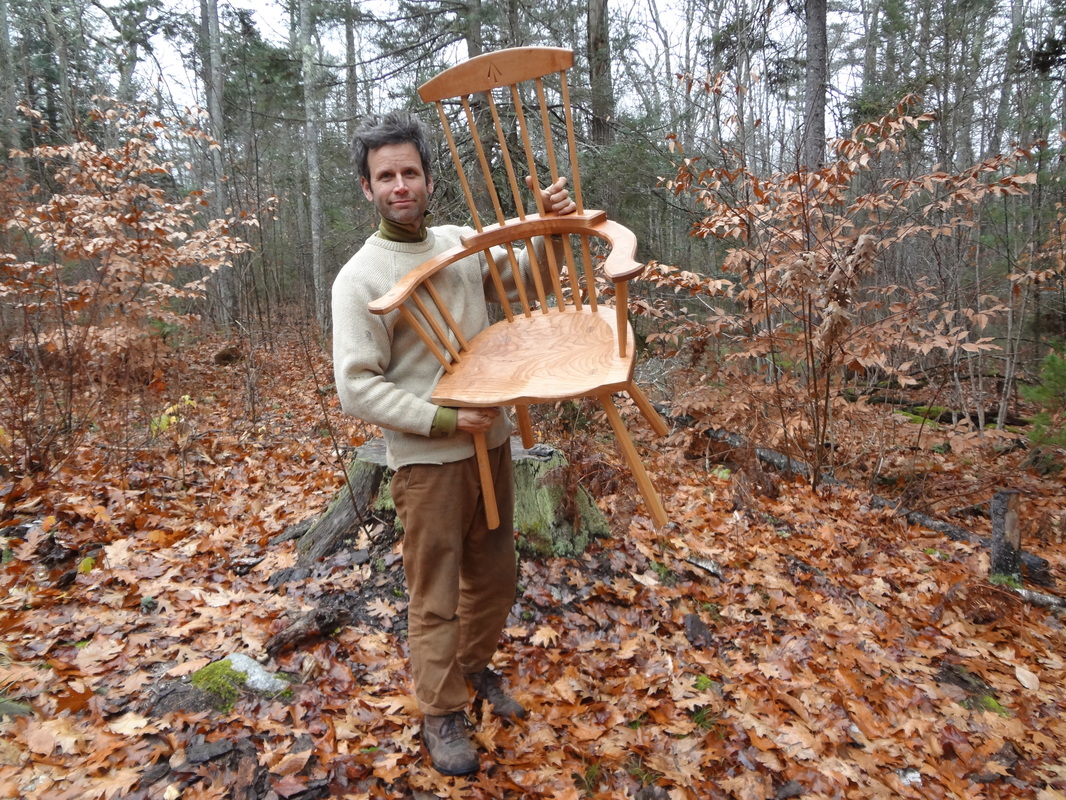 I let the tung oil sit on there at least 10 minutes, usually by the time you’ve finished applying the oil to one part of the chair, it’ll be time to start wiping down the parts of the chair where you started applying the oil first. I usually wipe and buff it enough so that it doesn’t feel like the rag is dragging any more, I really want to get all the oil off that isn’t soaked into the surface. I might apply a little bit more on the end grain to help that seal in. I let the first coat of high luster, polymerized tung oil dry for 24 hours. Usually I don’t have to use the sandpaper anymore, at this point I just use the 0000 or 000 grade synthetic steel wool, and I buff the oil. And then I do another coat - ideally I do 3 coats of oil like that. And then after all that’s dried, if you really want to buff it up nicely you can use a little bit of a paste wax finish on the chair. I usually just use the paste wax on the high wear areas, like the seat and the tops of the arms and maybe the comb. I don’t usually do the paste wax except on the high-wear areas because I find the paste wax is kind of hard to get off around all my spindles, especially since I leave the spindles faceted.  You can reapply the oil over time if the piece gets scratched or needs to be brightened up again. Or if you ever need to you can wipe the surface down with a little denatured alcohol, to get the paste wax off, and then you can apply more polymerized tung oil, maybe after giving it a light scuffing with some synthetic steel wool or some sandpaper and you can apply another coat in years to come. So it’s an easy to maintain finish over time, although I find that it seems to hold up well, even without doing that. It just gets better over time. I’ve used this finish on a very white birch chair and it looks lovely, the birch has mellowed a little bit, gotten warmer in tone over time, but the finish stays nice and clear and I haven’t had any trouble with it at all. 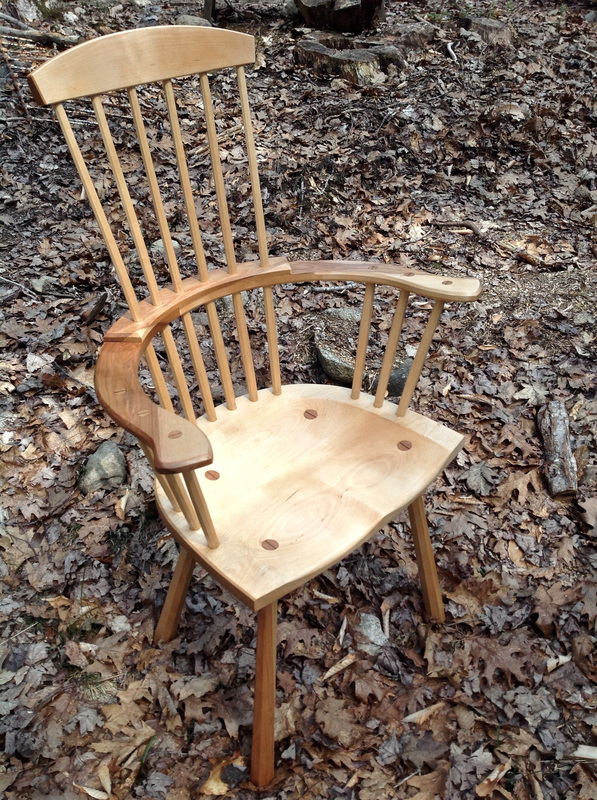 the birch Windsor One challenge I’ve had has been in the long term storage of opened cans of polymerized tung oil finishes. They will oxydize when exposed to air, as any oil finish will, so trying to store an open can of this stuff and not have it oxidize and set up in the can has always been a problem. I have tried something called "Blocksoygen", which is a can that sprays gas into an opened can of finish or paint to replace the oxygen (with something non-reactive). I have also had collapsible ridgid containers that are shaped like an accordian that you can push down to get the oxygen out. But even so, I’m always finding my tung oil sets up and gets wasted. A couple of months ago, I found these plastic ‘Stop Loss’ bags (from Lee Valley). They look a lot like a plasma blood bag that you might see used at a hospital for an IV. When I saw these flexible bags I was impressed and thought they may be a really good solution to my problem. You can compress them as you use the liquid so there is no air in the bag at all. So far they have been working great.” - KK 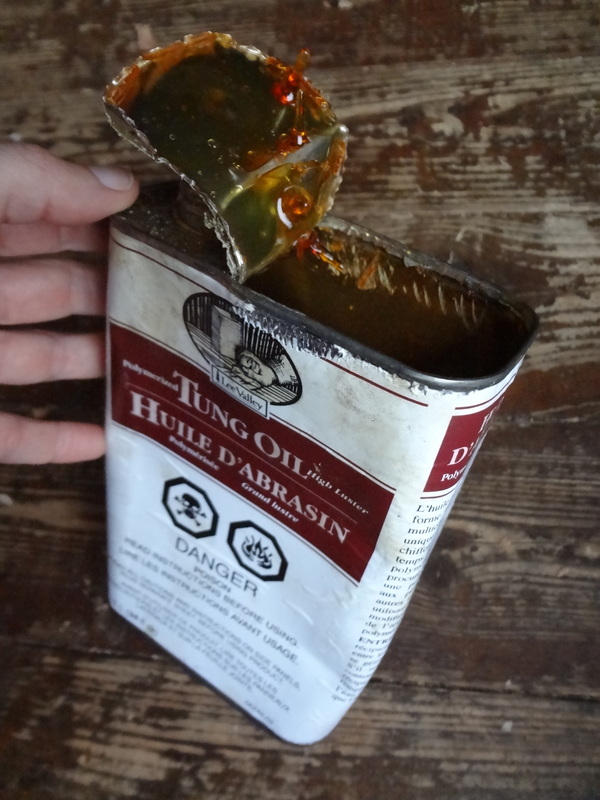 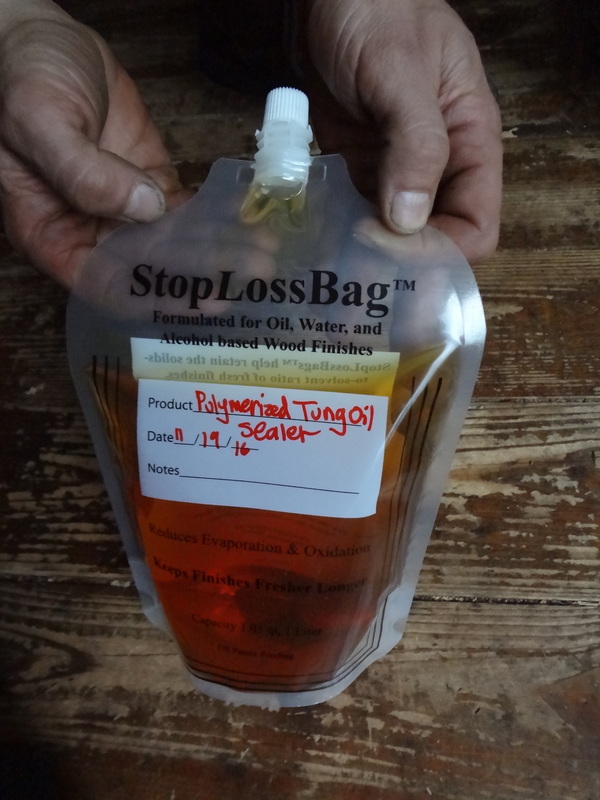 Next up: how Kenneth finishes smaller items like spoons & bowls, which is a similar but slightly different process. “Handmade work has soul, it has verve, a sparkle which a machine cannot reproduce.”
3 Comments
StevenK
12/14/2016 11:11:48 am
Thanks Kenneth--I've found this very helpful. I've a number of items that I need to finish. This gives me some very good ideas to work with.
Tom Stephens
2/12/2017 06:13:22 pm
please add to your email list
John holmshaw
2/13/2017 01:20:02 am
Leave a Reply. |
Authors:
Angela & Kenneth Kortemeier If you'd like to sign up for our email list, please follow this link:
The little button below (RSS feed) will allow you to
follow the blog without subscribing to the newsletter. Archives
March 2024
Categories |
 RSS Feed
Proudly powered by Weebly