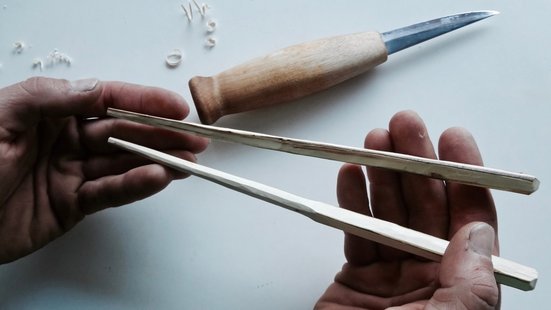
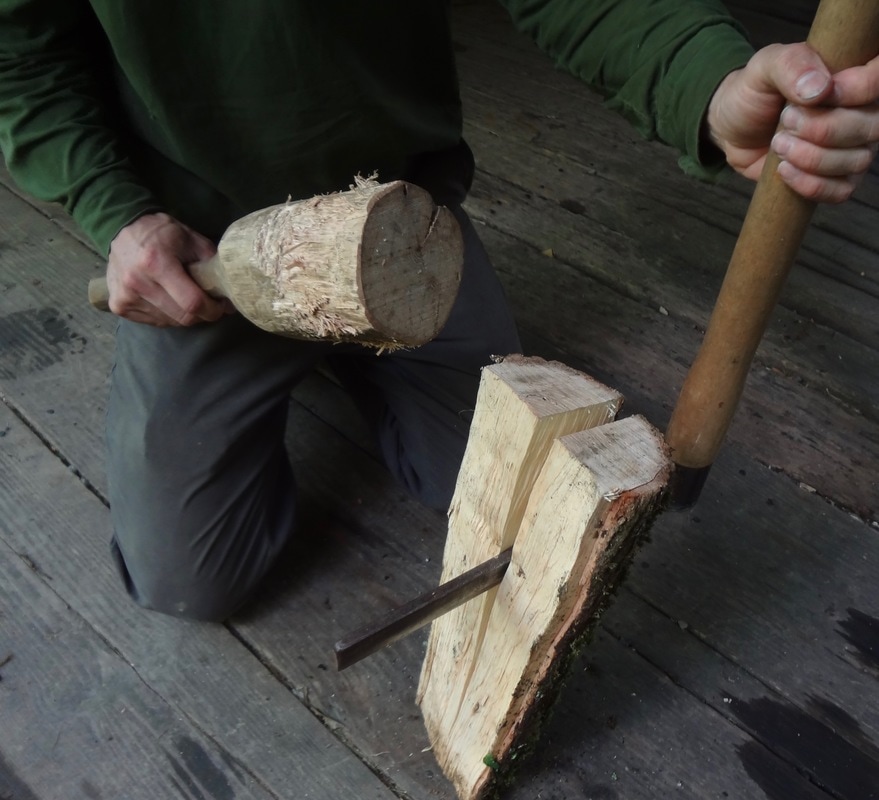
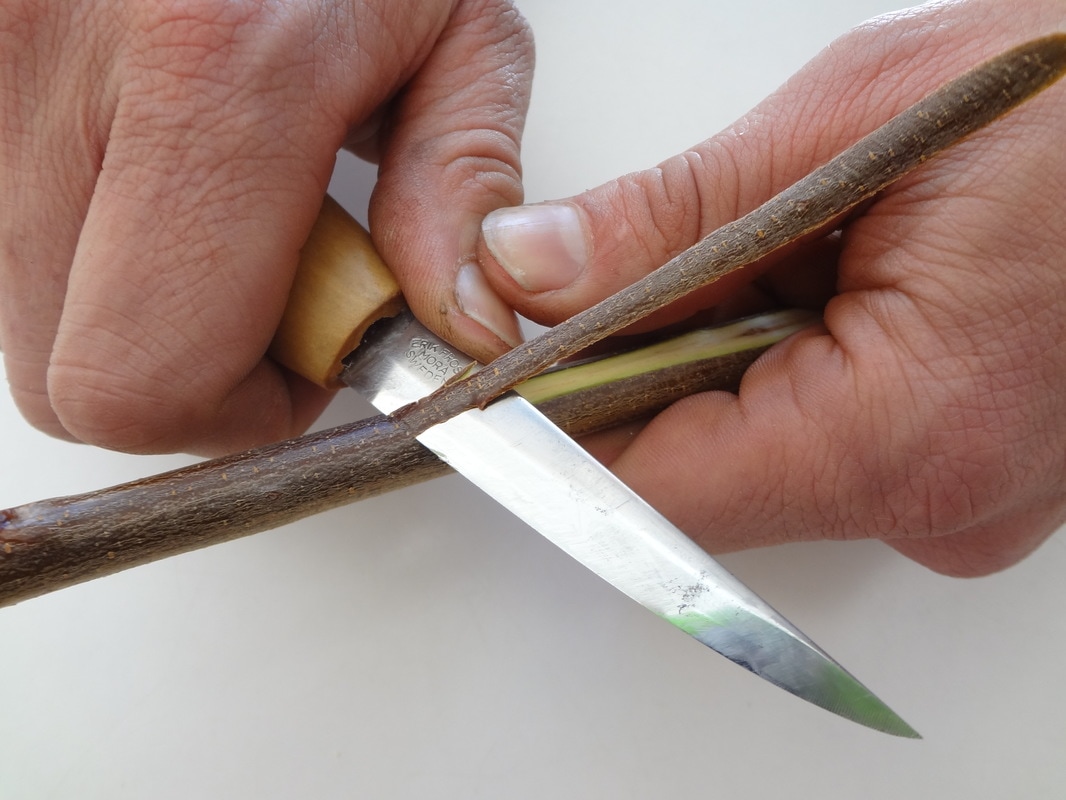
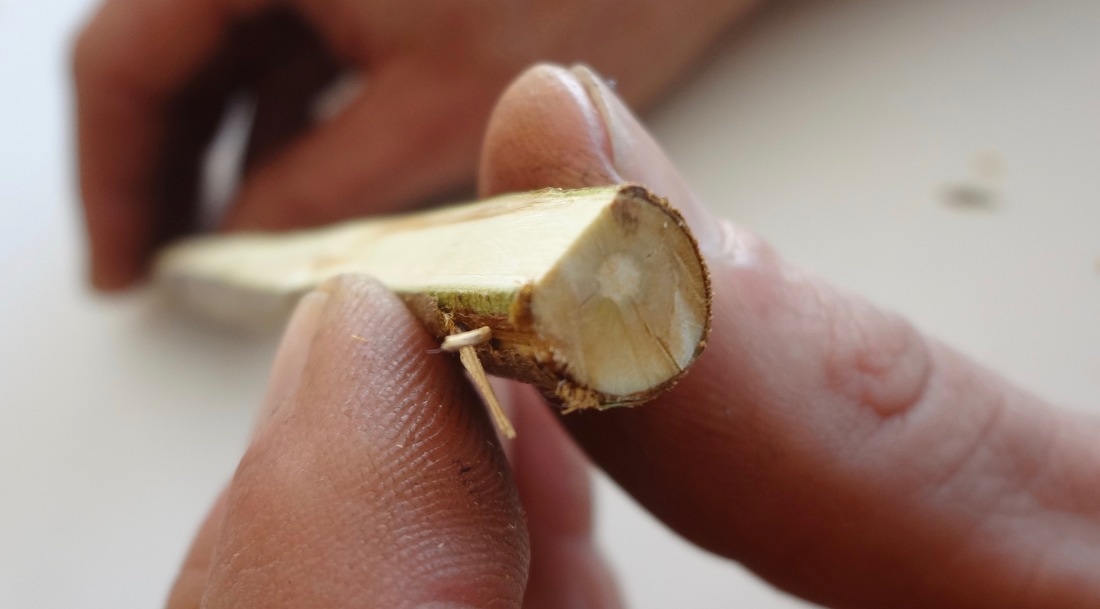
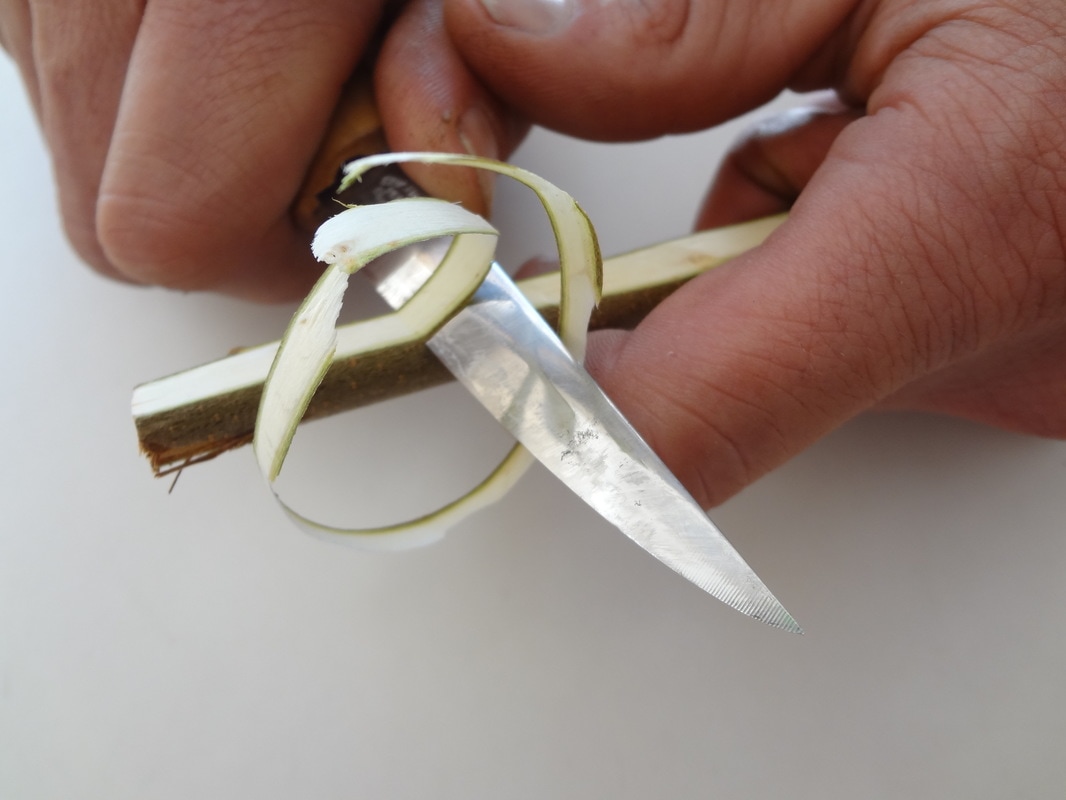
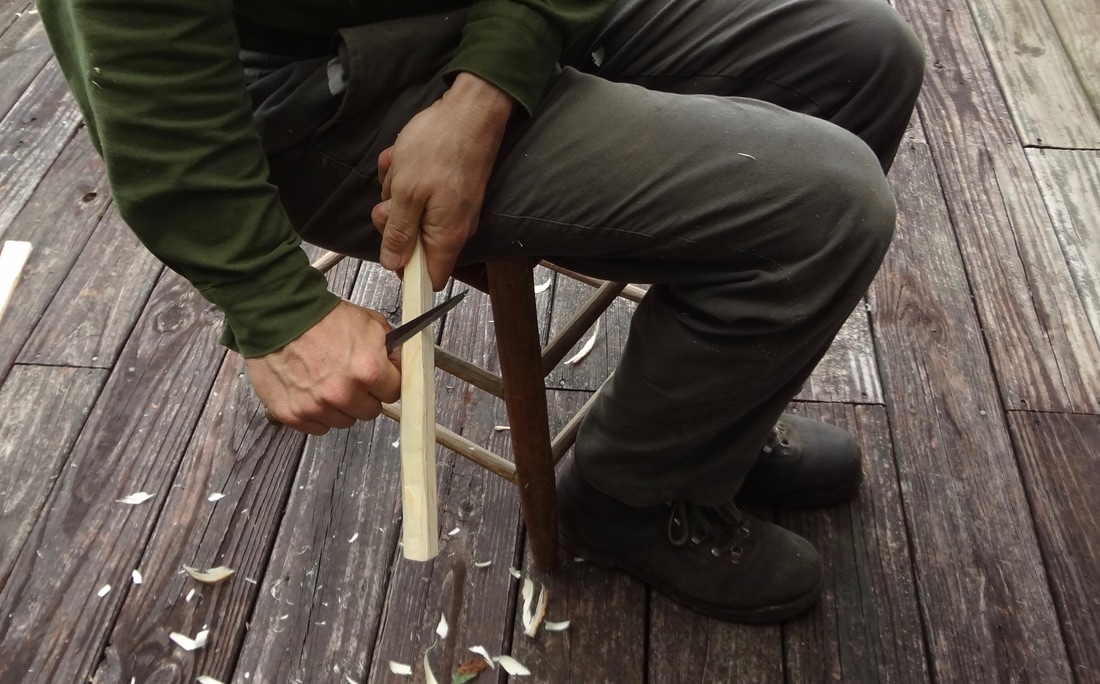
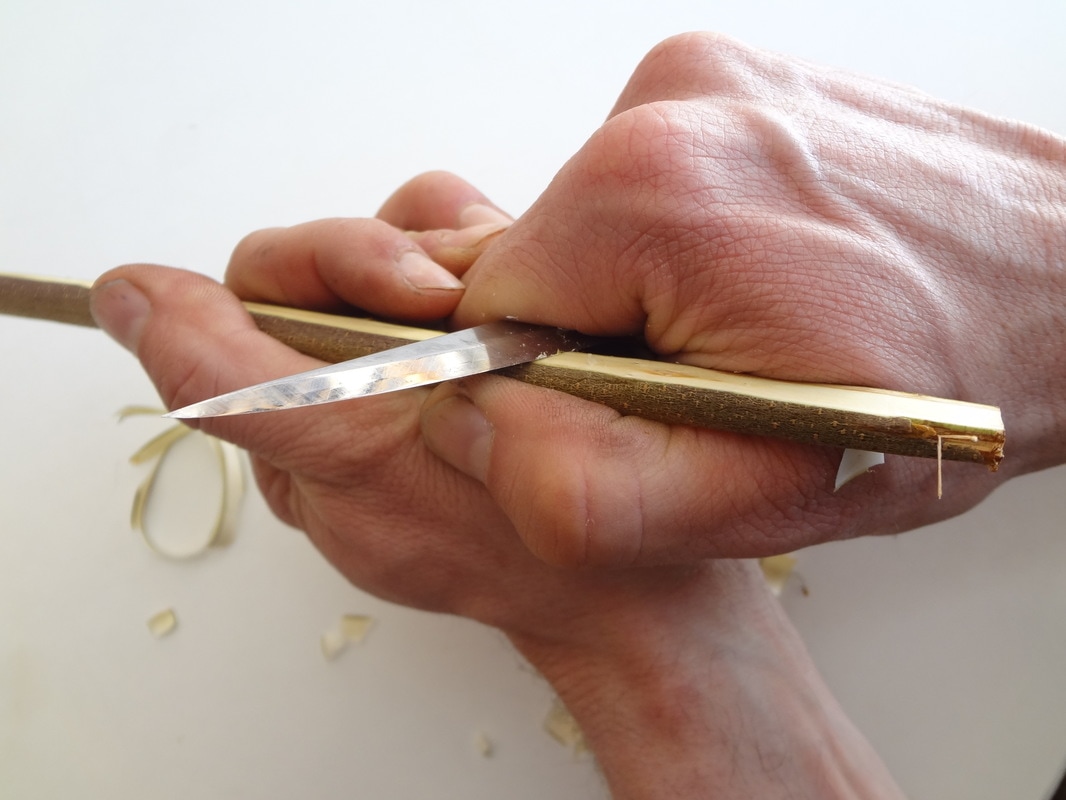
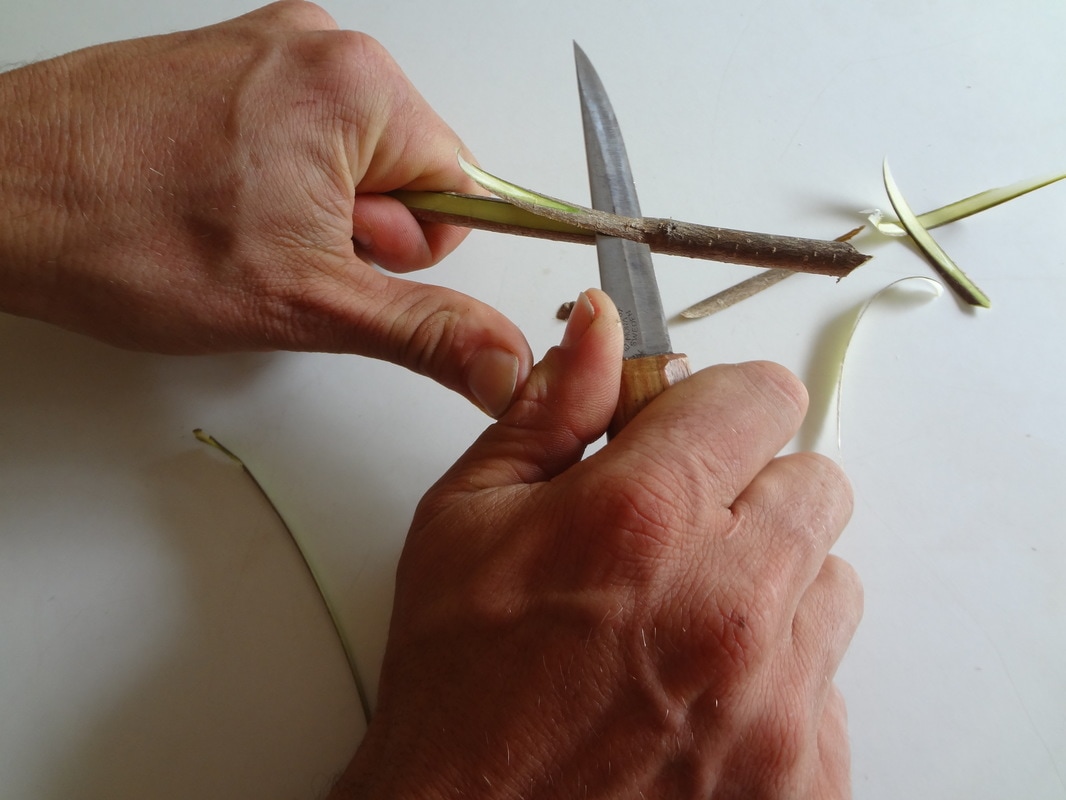
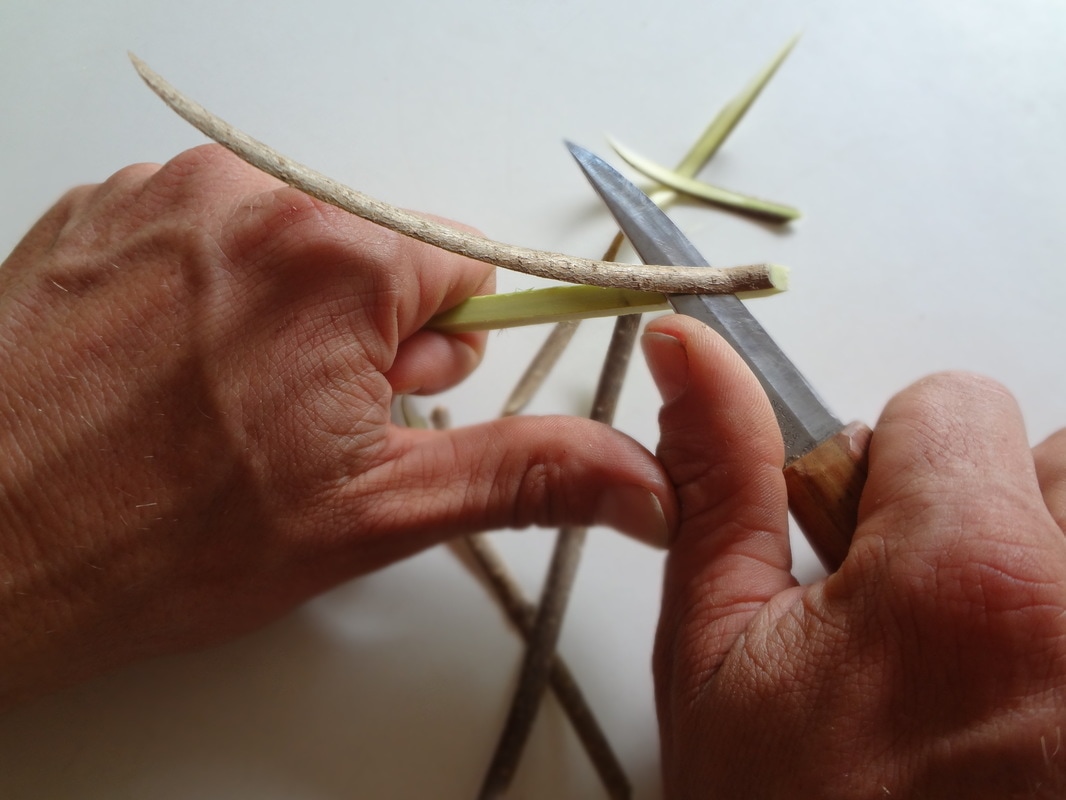
 Most of you who are currently subscribed to our blog & newsletter are perhaps a bit beyond your first carving project, so this entry might be something you’ve already mastered or can easily and quickly do. So it may be that this article is a chance to introduce someone to hand work who you think might really take to it. A golden opportunity to turn somebody on to what we think is an essential part of being human, but which most members of our current culture are missing out on — that is, working with our hands, tools and wood. The more people who take the time to practice hand skills, the better, saner and happier our world will be. All you need is a sloyd knife, some short lengths of wood and an hour or so to get started. - AK “Chopsticks are an excellent introductory carving project because of the minimum of tools and materials required. It’s a quick, accessible place to start with an immediately useful end product. We’ll practice important, basic carving skills like creating even, flat and tapered planes, which will ultimately be used in any and all three-dimensional carving projects in the future. Making chopsticks introduces various knife grasps or grips, and there’s the chance for some decorative carving as well. The only tool needed is a sharp knife with flat bevels, I prefer a sloyd knife such as the Morakniv model #120. A small pruning saw is helpful but not required. There’s something really universal about carving a sharp little stick -- most people have probably carved hot dog sticks or spears, maybe when they were children. Those pointed sticks might have been the last or even the only thing they ever carved. This project is a good place to pick up the thread and continue building upon what used to be universal, essential human skills. So, for chopsticks, we’re still making a pointed stick, but it’s a meticulously thought-out pointed stick, and it’s also tapered, which gives some nice challenges. A friend told me that Jarrod Stone Dahl was using chopsticks as an initial carving project at Greenfest last year. Drew Langsner has students carve butter spreaders, also a comparably simple project, before endeavoring to do spoons in his classes. I would suggest chopsticks first, a Shinto fox head second, a butter spreader next, and then a spoon. That’s been working well for beginner students at the workshops I’ve been teaching this winter. It’s a good first project too, in terms of finding appropriate wood, since it shouldn’t be terribly difficult to procure a few lengths of what you need wherever you live. 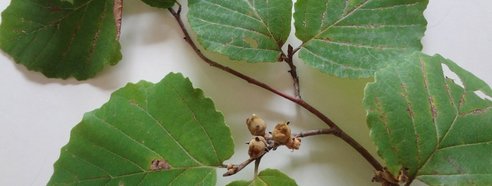 WOOD: Choose wood from flowering ornamental, fruit or nut producing trees, something that has tight grain such as apple, pear, peach, walnut, mountain laurel, yew, Bradford Pear, etc. Here in Maine we’ve got great old apple and pear trees everywhere which need pruning every year. The new growth (called suckers or water-sprouts) that shoot up from older, established branches is ideal. Trees which have been cut down but which still have life in their roots will also send up straight new sprouts from their base or roots. These tightly spaced and crowded, fast growing branches are straight, often about the right diameter to start with when they are young, and since they are competing for sunlight, the bottom portion of whips usually doesn't have a lot of outgrowth, so they’re basically clear of knot holes and multidirectional grain. 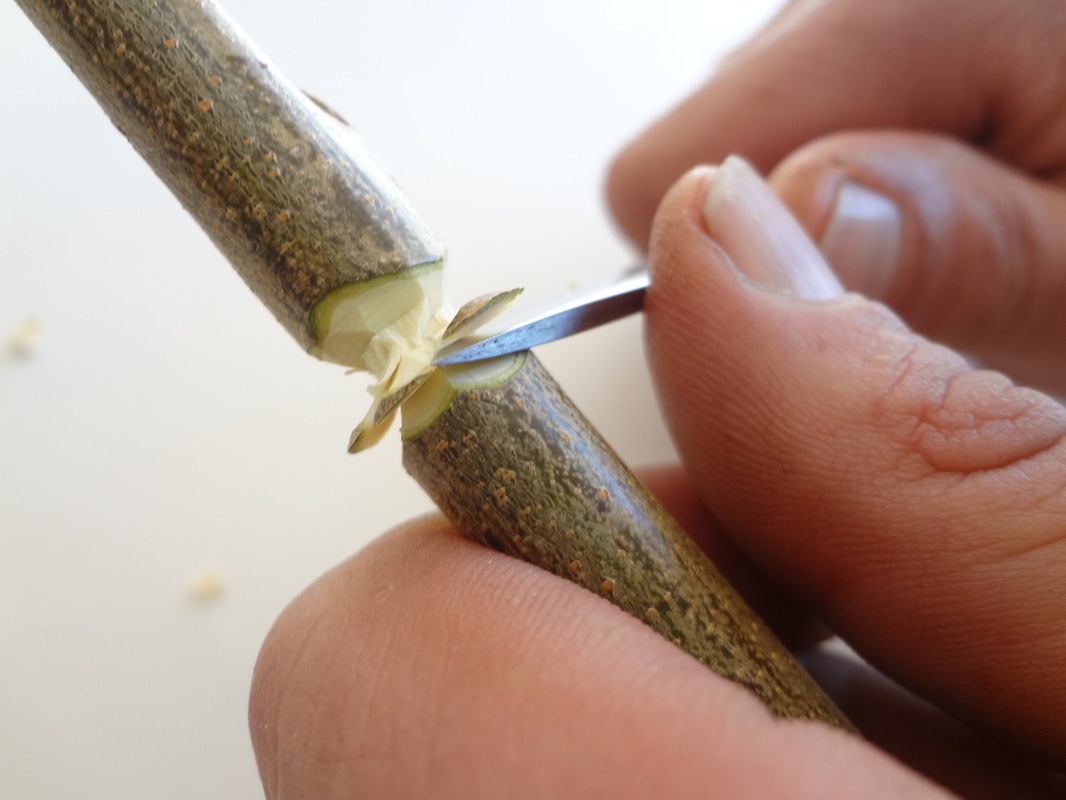 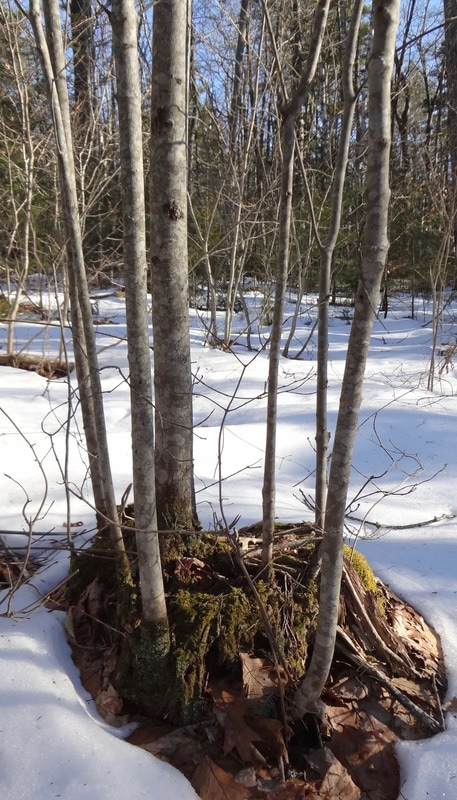 If you don't have a saw, you can use your straight knife and the “Rose petal cut” to remove the sprout from its base. Please note — take some time to research tree pruning if you’re not familiar with how to do it properly. Be considerate and careful and don’t do any harm to trees or private property. Your wood needs to be straight grained and it’s also best if it has a solid pith. Some species, ones that are usually not fruit or nut producing trees (like Striped Maples), have a punky or spongy center in their shoots. These are less ideal because the soft pith will allow a weak point at the tip of your chop sticks. If larger chunks of hardwood happen to be more available to you and you know about riving, you can rive out an appropriate piece of wood from some straight grained hardwood. You’ll need an additional tool called a froe, plus a club or something for driving the froe into the wood to be rived. A heavy bladed knife can be substituted for the froe in small diameter riving blanks. Straight grained green wood (or wood that is freshly cut and has not dried out) is easiest to carve and is a great material for a brand new woodworker to start with, but you could use straight grained air dried wood for this project as well. It’s a fairly small amount of carving and so dry (and thus harder) wood is fine too. 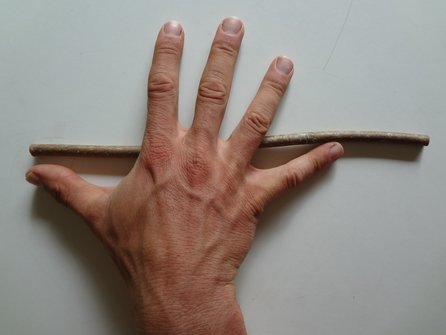 Your chopsticks are custom fit to the size of your hand. Determine the length of wood needed by stretching out your hand and fingers as wide as possible — the distance from the tip of your thumb to the tip of your pinky finger diagonally across your hand is your ideal chop stick length. In terms of thickness, I like to start with wood that’s 3/8” to 1/2” in diameter, if it’s from a shoot or sucker. If it is riven, then it should be square and as close to 1/2” x 1/2” as possible. KNIFE: You’ll need a straight, sloyd type carving knife, one that’s been ground with a very flat, single bevel. An average jack knife or pocket knife usually is sharpened with a secondary micro or rounded bevel at the leading edge, so those kinds of blades are not ideal and will prove a challenge to control with precision. Any derivation from flat in the leading edge of your knife blade will make it more difficult to register the knife against the wood and you’ll likely make imprecise cuts, resulting in shallow divots in your work and an inability to control the depth of your carving cuts. The Swedish knife manufacturing company Morakniv has two basic knives that will work well. They are the #106 and the #120. You’ll develop control when you practice carefully and consciously registering the flat of the knife against the wood as you practice making long, smooth cuts along the length of the chopsticks. This is basically the premise of this exercise — to perfect your control of the knife blade and to consistently register it against the wood, creating long, even cuts and therefore precise planes, shaped just how you wanted them to be shaped. CARVE: You’ll carve your chopstick to have a long, square, tapered shape, from full width, about 3/8” or 1/2” square at the wide end, to about 1/8” square at the other, smaller end. If you are using a water-sprout or shoot, notice how you can see the pith or center of the wood at each end of your billet. You’ll carve flat, even planes toward this pith as the center or focus, first and especially at the narrow end, eventually with four square planes oriented evenly around it. If you’ve got a riven billet you could draw a center point onto the small end. Start by choosing one side and work with your knife to make it as flat as possible. You’ll practice running the knife down the length of the billet in such a way that you get as long and consistent a shaving as possible. It helps to look at the way the shaving is turning out just as much as you are assessing the surface you’re going to be left with. Concentrate on registering the knife’s bevel so that you have enough control of the knife that you can make long even shavings and flat, consistent facets. Bring your first flat tapered side to within about 1/16 of the central pith at the narrow end. It might not take long if you have chosen a length of wood that is close to the finished, final size. If you have, you might do very little work to the wider end of the stick. If you have an oversized stick you might have a lot of work to do and get a lot of practice making good shavings. Once the first plane is finished, flip the billet over and repeat the same process to make a flat, tapered plane which is parallel to the first side. Go from full 1/2” - 3/8" width at the wide end down to 1/16” from the pith at the narrow end, so that you end up with an 1/8" thick rectangle at the smaller end. 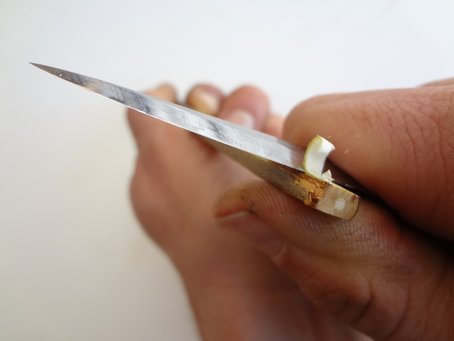 The two planes should now be parallel to each other, straight and flat. The smaller end should measure 1/8” between the two planes, with the pith centered between them. As you carve these two planes, keep checking or sighting them to make sure they are flat and parallel to each other. This is done by holding one end up to one eye and looking down the length toward the other end, noticing if it looks straight or not, then carving away any high points until you deem it is flat. 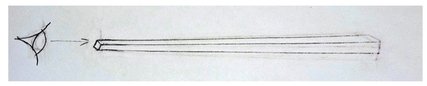 There is a tendency to do short, shallow or scallop-shaped cuts, where the knife comes in and out of the wood quickly. This will produce shavings which are more like chips, as opposed to nice, curled ribbons. It will also leave behind a surface that is scalloped and dished. Remember that for this project we are practicing making surfaces as flat as possible. Strive to make shallow, long cuts, ones where you don’t take off too much material at once. Carving deep cuts will bring about fatigue and can be dangerous since there’s more force and muscle needed to cut through a thicker shaving. Deep cuts will lead to less control and precision in all aspects of carving. It is helpful to skew the blade as you slice it through the wood. This means starting the cut either at the hilt or tip of the blade and pushing the knife across the work at the same time as you draw or push the blade down the length of the wood. Cutting efficiency is increased when the blade is sliced and/or skewed through the wood. To illustrate this, imagine pressing a sharp blade into a tomato without moving it side to side. As you know, the sawing motion greatly increases the efficiency of the cut. The same principle is true when cutting wood. 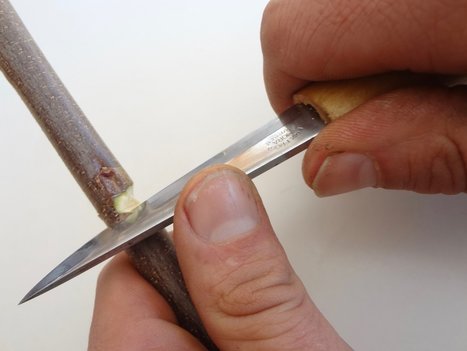 thumb on the back of the blade GRASPS: There are several grasps, or ways of holding the knife and your work that you can use. One is to push on the back of the blade with the thumb. 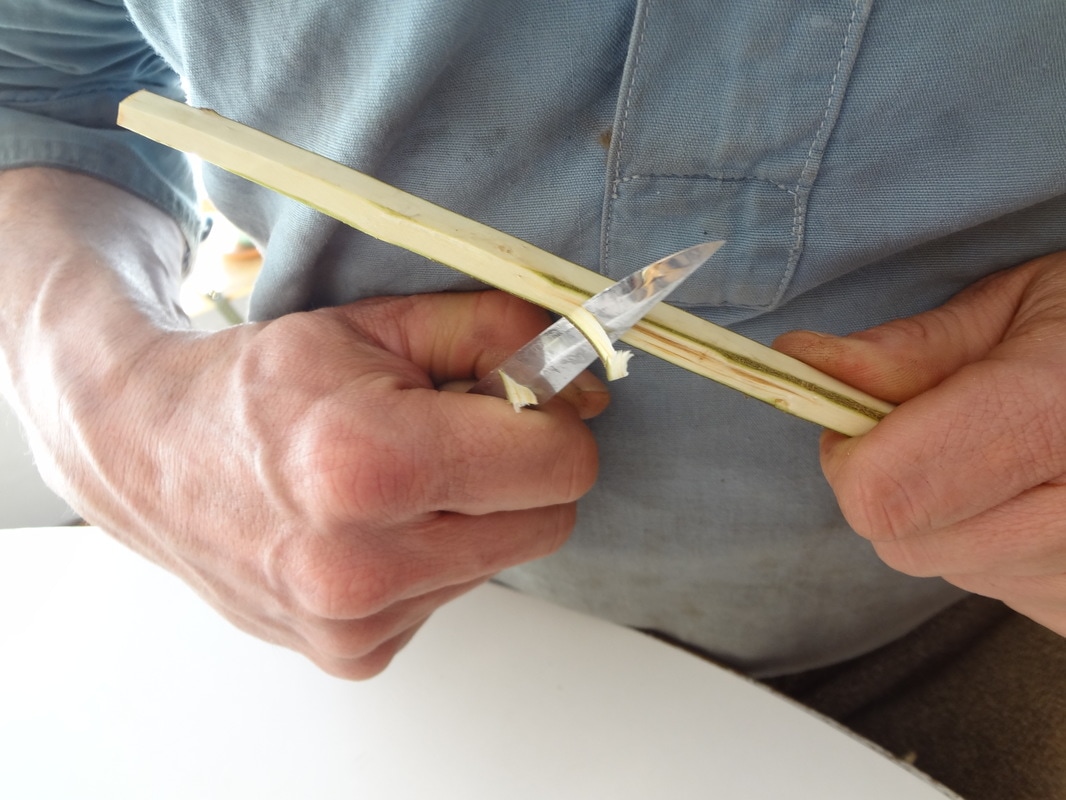 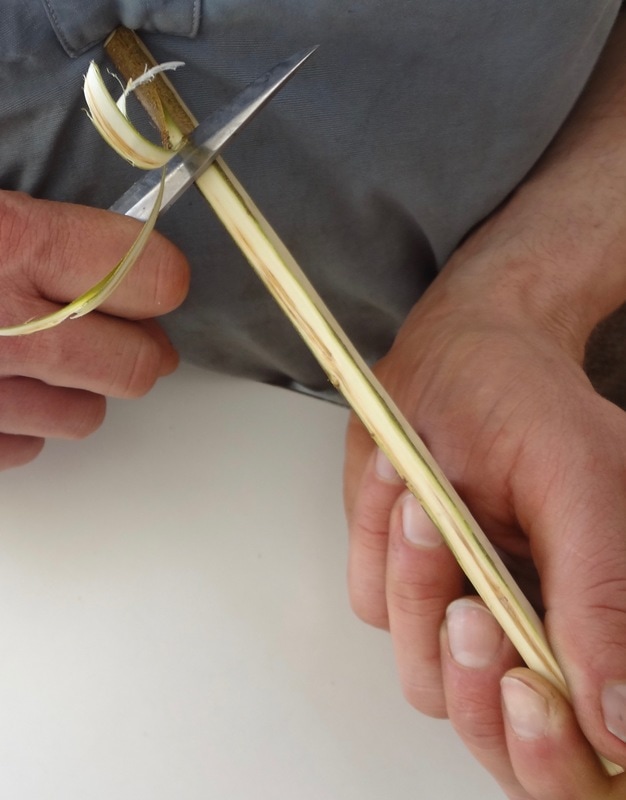 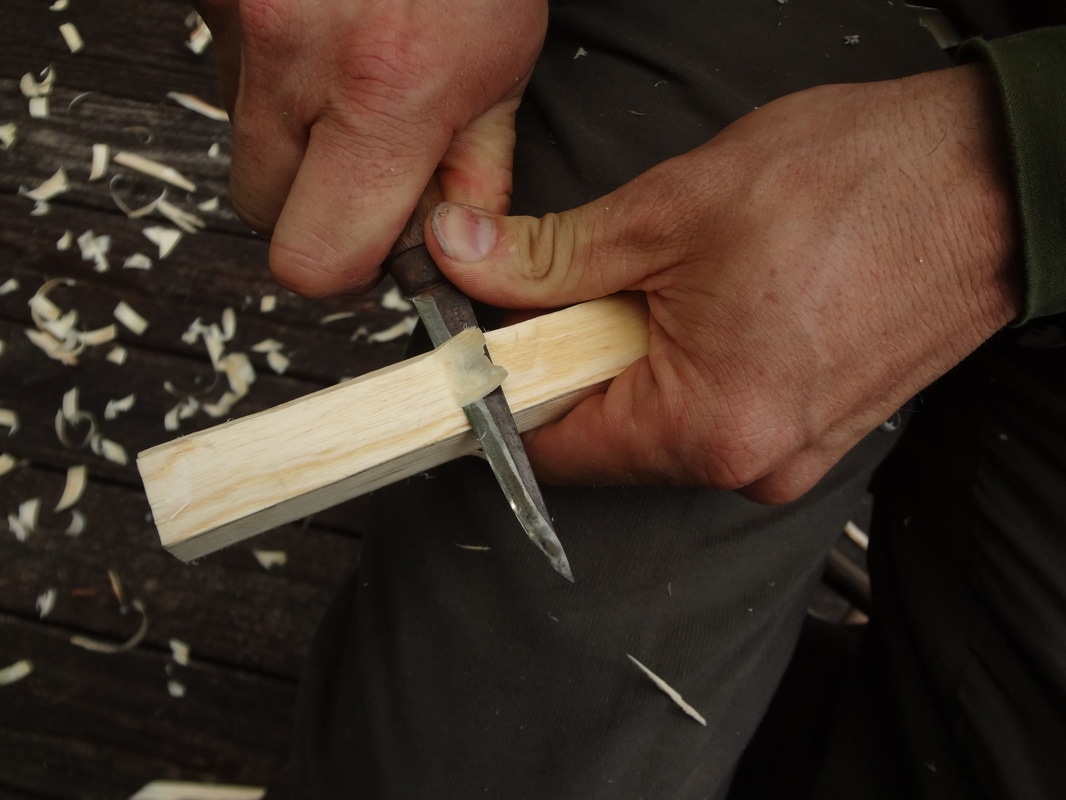 Then there’s the 'can opener' grasp, where the hand holding the work kind of crab crawls up as you’re making a cut. There's the 'cutting from the shoulder' grasp. And the 'spreading' or 'opening the chest' grasp. (We're working on a blog entry all about grasps, coming soon.) MORE CARVING: When your first two opposite sides are done (flat, tapered and parallel), you can start working on the 3rd and 4th sides, following the same procedure in making smooth, long cuts and shavings, creating flat planes that are tapered and parallel. 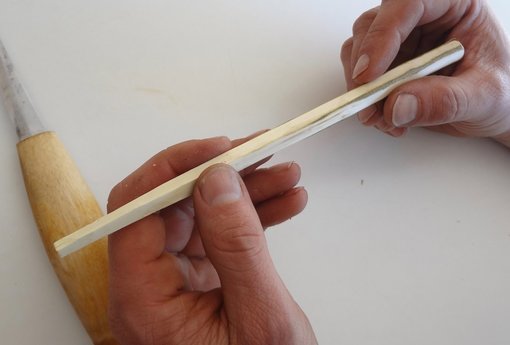 You want to finish with good, square ends, final size should be 3/8” or 1/2” on the wide end, 1/8” at the small end. Make sure the ends are not parallelograms or trapezoids, but actually square. If you like, your chopstick can be complete at this point. Let your chopstick dry (usually it takes just a day). Wrap it in a thin cotton cloth such as a bit of t-shirt material. This will slow down the drying and help prevent checking. Finish it with tung oil if you like and you can use it for cooking or to put your hair up. If you have carved a mate for it you can eat dinner with them. 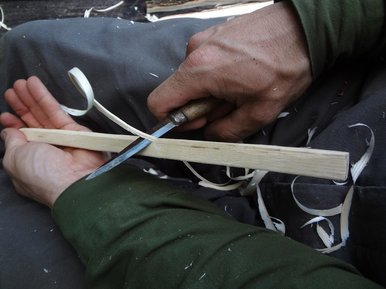 cutting the arris/octagonalizing Or you can go a few steps further and do additional carving if you’re interested in more practice, detail or decoration. I personally like to do some extra carving after I have dried mine. Generally the top 1/3 (the wider end) of the chopstick I’ll leave square, but the bottom 2/3, at the narrower end, I’ll carve into an octagon for a more rounded and refined shape. To do the octagonalizing, run your knife down the arris (this is the corner or the edge formed by the meeting of two flat or curved surfaces) of your tapered square. 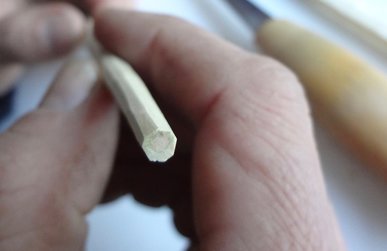 Just as with the flat planes earlier, keep your shavings long and thin. Try to keep the width of your faceted planes even and consistent with one another. The use of indirect lighting from a window or table lamp will help to highlight the facets and arrises. The depth of the cut is what determines the width of the facet, in order to make them wider apart take a deeper cut. If you go too deep on one side, you will need to work around all the facets to make up for the over cut and to make every other facet consistent. You can use stop chamfers to transition from the square part of the chopstick to the octagonalized section. The chamfer kind of rolls out and up in an arc toward the corner of the (original squares’) arris.  a stop chamfer FINISHING: Once you have the lower part octagonalized and the upper third is still square, your more detailed chopstick is basically done other than the ends. The narrow end probably just needs to be smoothed and rounded, as that is the part of your utensil that comes into contact with food. The wide end could be treated with a sort of finial or something fancy if you like, or it can be smoothed and rounded or maybe faceted for a simpler finish. Make yourself another one and you’ll have a pair ready to go. (check out the blog entry about oil finishing spoons. [link is here] You can use the same process for all your carved wooden utensils) You can get a lot of carving practice through making more chopsticks, they make great, quick gifts and you can really hone your most essential carving skills, skills you’ll use any time you carve three-dimensional items such as spoons, bowls or chair parts.” - KK 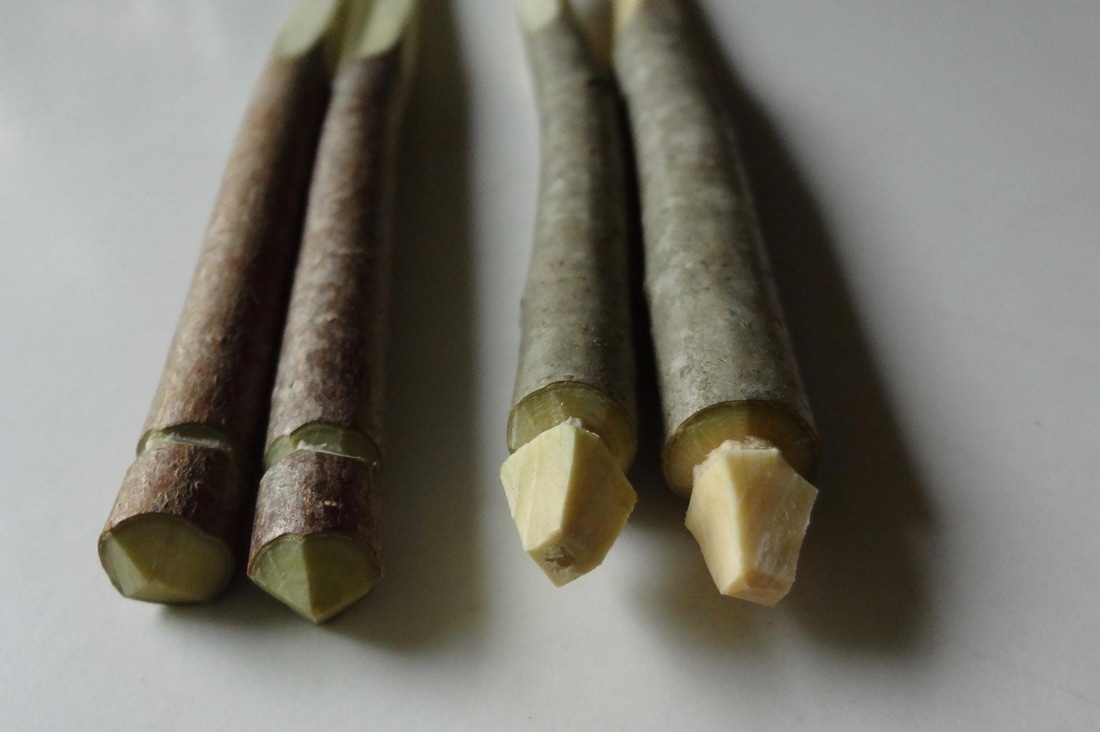
2 Comments
Jeff Polaski
3/11/2017 07:44:10 pm
I'd start in the the morning but first I have to source the wood -- always an issue in the city (Philadelphia). Is there a season better than others? The snow on the ground in the pictures doesn't relate well this far South from Maine.
Kenneth Kortemeier
3/14/2017 11:10:56 am
Hello Jeff, Leave a Reply. |
Authors:
Angela & Kenneth Kortemeier If you'd like to sign up for our email list, please follow this link:
The little button below (RSS feed) will allow you to
follow the blog without subscribing to the newsletter. Archives
March 2024
Categories |

 RSS Feed
Proudly powered by Weebly